|
|
|
|
|
•
|

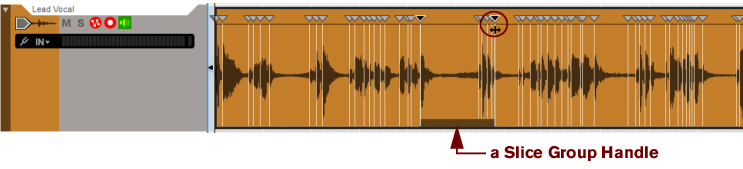
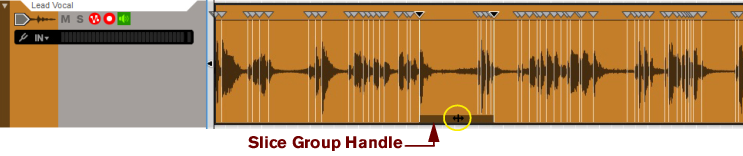
If more than one Slice Marker has been selected, a Slice Group Handle appears below the waveform. You could then click and drag the Slice Group Handle sideways to move all selected Slice Markers as a group, see “Moving several Slice Markers”.


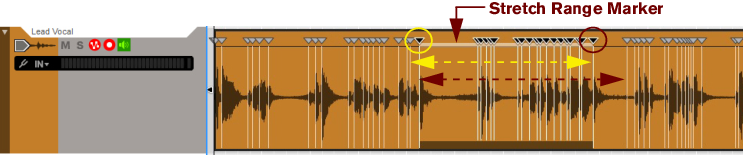
The range of Slice Markers can then be moved as a group by clicking and dragging the Slice Group Handle sideways. You can also stretch the range in an “accordion style” fashion by clicking and dragging any of the selected Slice Marker Handles in the range, see “Stretching a range of Slices”.
Now, you can move all Slice Markers as a group by dragging the Slice Group Handle sideways (see “Moving several Slice Markers”), or stretch the entire range of Slices (see “Stretching a range of Slices”).
|
|
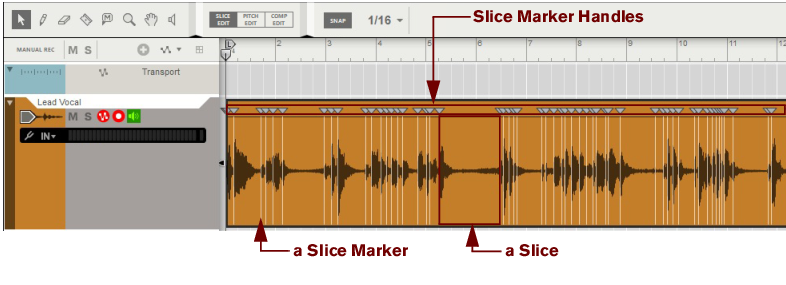
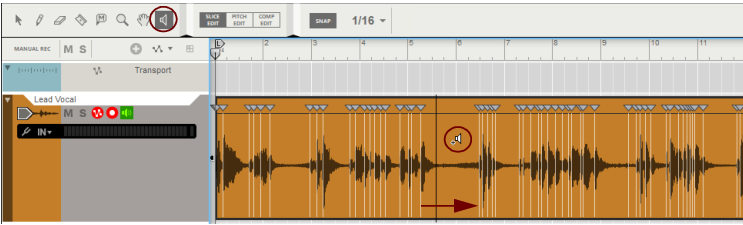
If you are not satisfied with the position of the Slice Marker, you can reposition it afterwards, see “Repositioning Slice Markers”.
|
|
|
|
|
|
|
•
|
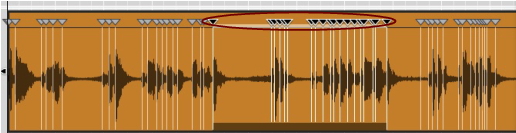
It’s also possible to move a range of Slices by selecting a range of Slice Markers as described in “Selecting Slices and Slice Markers” and then dragging the Slice Group Handle sideways.
|

|
|
|
|
|
|


If you like, you can now select the desired clip(s) and move, reverse (see “Reversing audio clips”) or choose to bounce the clip(s) to samples (see “Bounce Clip(s) to New Sample(s)”).
|
|
|
|
Refer to the “Dr. Octo Rex Loop Player” chapter for information on how to work with REX Loops in the Dr Octo Rex device.
|
|
|
If you want to load your REX Loop in another sampler device, you first have to un-self-contain the REX file, see ““Un-self-containing” a Song”. Then, create the sampler device and load the un-self-contained REX file from disk.
|
|
3.
|