Common Operations and Concepts : Areas, windows and basic navigation

Areas, windows and basic navigation
Song window overview
A Reason Song window with its Browser, Main Mixer, Rack and Sequencer areas.
The Reason graphical user interface is divided into four main areas:
The Browser is where you create devices, load patches into devices and load songs.
The Main Mixer is located at the top in the Reason Song window. Here are the channel strips for the audio and instrument tracks in your song.
The Rack is where all sound and effects devices you use in your song are located. The Rack resembles a traditional hardware rack, where sound modules and effects units can be mounted.
The Sequencer is where you record your audio and instrument tracks. Here you can also record automation of device parameters in the Rack and of channel strip parameters in the Main Mixer. The Sequencer also incorporates the Transport Panel, where all sequencer transport controls are located.
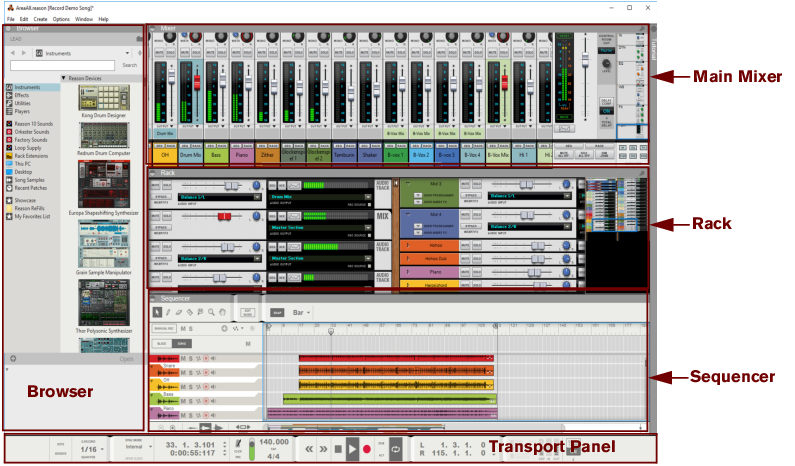
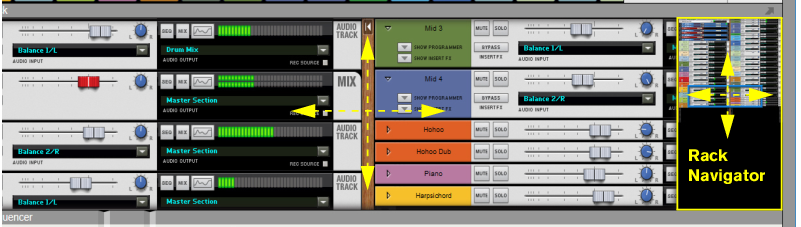
The areas can be viewed together, as in the picture above, in pairs or separately - see “Navigating between the areas”. The areas can also be resized - see “Resizing”.
The Browser
The Browser to the left in the Song window (and also in the Rack window, if the Rack is detached) features short-cuts for creating devices, loading patches and songs, and sample management functions. By pressing [F3] you can toggle between Show and Hide Browser.
The Browser with the Instruments palette selected.
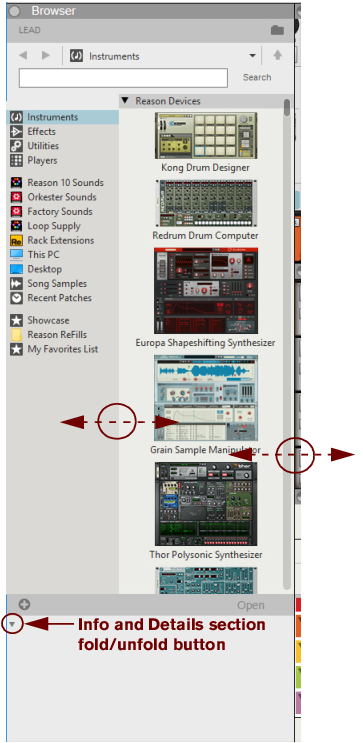
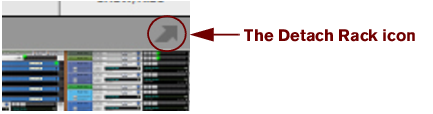
See “About using the Browser in the detached rack” and “Creating devices” for information on how to use the “Device” functions.
See “Using the Browser” for information on how to browse for patches and songs.
See the “Sampling” chapter for information on how to use the “Song Samples” functions.
The Main Mixer
The Main Mixer with the Fader sections currently scrolled into view.
In the Main Mixer, all channel strips of the Reason song are visible. You can scroll vertically in the Main Mixer by clicking and dragging inside the frame in the Channel Strip Navigator to the right. This way you will be able to access all channel strip parameters. If you have a lot of channels in your song you can also scroll horizontally by clicking and dragging the Mixer scrollbar at the bottom of the Main Mixer area.
This is especially useful if you are using multiple screens with your computer.
The Detach Mixer icon for the Main Mixer.
For more details about the Main Mixer, please refer to “The Main Mixer” chapter.
The Tutorial area
*
*
The Rack
The Rack with two rack columns next to each other, and the Rack Navigator to the right.
In the Rack, all instruments, effects and mixer channel devices of the Reason song are visible. You can scroll vertically and horizontally in the Rack by clicking and dragging the frame in the Rack Navigator. You could also click anywhere outside the frame in the Rack Navigator to immediately jump to the desired position. Alternatively, place the pointer on any of the wooden “side panels” in the rack, and click and drag in any direction. This way you will be able to access all devices in the rack.
This is especially useful if you are using multiple screens with your computer.
The Detach button for the Rack.
When you detach the Rack, the Transport Panel at the bottom of the Sequencer will be duplicated below the Rack in the new window. This way, you will be able to control the Sequencer transport functions without needing to change window. There is also a second instance of the Browser available to the left in the detached Rack. By pressing [F3] you can toggle between Show and Hide Browser in the detached Rack.
For more details on how to work with the Rack, refer to “Working with the Rack”.
The Sequencer
The Sequencer with a number of recorded audio tracks.
To the left in the Sequencer, all tracks in the Reason song are listed in the Track List. By clicking on a track in the Track List you select the track for playback from a connected MIDI master keyboard and/or for recording.
At the top to the left is the Toolbar, with various sequencer editing tools.
The big center section of the Sequencer is called the Edit/Arrangement Pane. Here is where all recorded sequencer data is displayed.
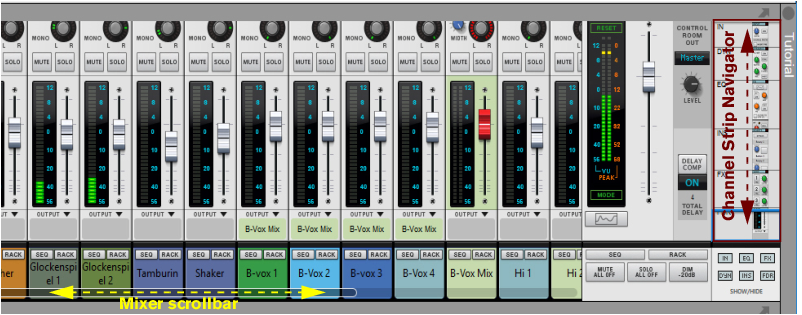
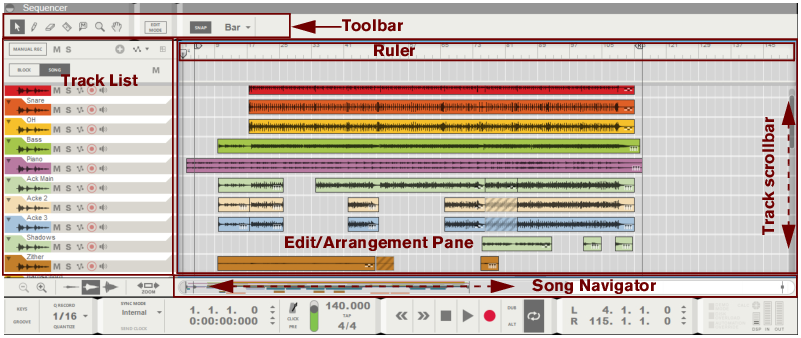
You can scroll in the Sequencer by using the Track scrollbar to the right and the Song Navigator at the bottom of the Sequencer - see “Scrolling” and “Zooming in the Sequencer”.
For more details about the sequencer, refer to “Sequencer Functions”.
The Transport Panel
At the bottom of the Reason Song window is the sequencer Transport Panel. From here you control the sequencer transport functions, such as Rewind, Fast Forward, Stop, Play and Record. You can also set Tempo and Time Signature and various other parameters.
The Transport Panel is always available together with the Sequencer. If you have detached the Rack, a duplicate of the Transport Panel will be also present in the Rack window.
To the right on the Transport Panel are indicators for Audio In and Out levels, DSP Load, Disk Overload, Audio Calculation, Demo Mode and Automation Override status.
For more details about the Transport Panel, please refer to “Transport Panel details”.
The ReGroove Mixer
To the left on the Toolbar in the sequencer is the “Groove” button. Clicking this will bring up the ReGroove Mixer.
The ReGroove Mixer is used for adding advanced grooves to your instrument tracks in the Sequencer.
To hide the ReGroove Mixer, just click the “Groove” button again.
For more details about the ReGroove Mixer, please refer to “The ReGroove Mixer”.
Navigating between the areas
By using the functions keys [F5], [F6] and [F7] you can quickly and easily navigate between the Main Mixer, Rack and Sequencer areas of the Reason window.
*
*
*
*
It’s also possible to press any of the [F5], [F6] and [F7] function keys simultaneously in different combinations to switch between combined area views. For example, pressing [F5] and [F6] simultaneously will bring up a combined maximized view of the Main Mixer and Rack areas in the Reason window. The Sequencer area will then automatically become minimized
Pressing all three function keys simultaneously, or holding [Ctrl](Win) or [Cmd](Mac) and pressing [F7], will bring up all areas together, equally sized.
*
*
To select an area for editing etc., simply click anywhere in the desired area. The selected area will then be surrounded by a thin blue rectangle.
Showing/hiding the Navigators
Deselecting “Show Navigators” on the Options menu will hide the Channel Strip Navigator in the Main Mixer and the Rack Navigator in the rack.
Selecting “Show Navigators” will show the navigators again.
About different Themes
In Reason you can choose from a couple of different visual themes, i.e. how the user interface should be visually presented. The selected theme affects the Sequencer, Browser and Transport Panel areas - the Rack and Main Mixer always use the default theme.
*
 
The selected Theme becomes active after restart of Reason:
Using several Reason Song windows
You can have several Songs open at the same time. Each Song will appear in a separate Song window, complete with Main Mixer, Rack, Sequencer and Transport Panel. Each Song window can be moved, minimized and resized using the standard Windows and Mac procedures.
The Tool Window
The Tool Window is a floating window which features two tabs that contain functions for editing in the sequencer and for editing grooves for the ReGroove mixer. The Tool Window can be accessed from the Window menu.
*
The [F8] key can be used for toggling between showing and hiding the Tool Window.
The Tool Window.
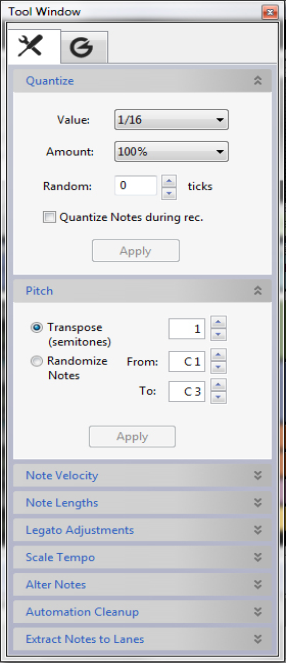
See the “Note and Automation Editing” chapter for information on how to use the various functions of the “Sequencer Tools” tab.
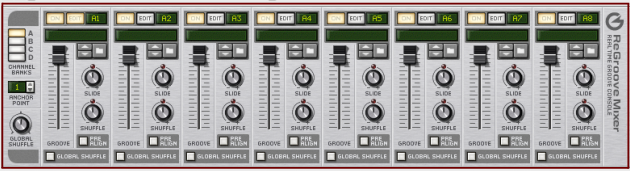
See “The ReGroove Mixer” chapter for information on how to use the functions of the “Groove Settings” tab.
The On-screen Piano Keys window
The On-screen Piano Keys floating window features a virtual keyboard which lets you play instrument devices without needing to have a MIDI master keyboard connected to your computer. The On-screen Piano Keys window can be accessed from the Window menu.
*
The [F4] key can be used for toggling between showing and hiding the On-screen Piano Keys window.
The On-screen Piano Keys window in “Mouse” mode.
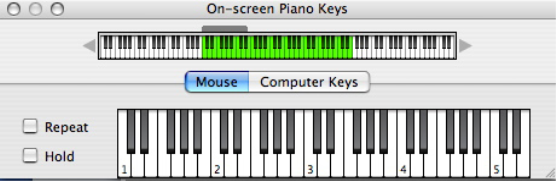
See “On-screen Piano Keys” for more information.

Common Operations and Concepts : Areas, windows and basic navigation