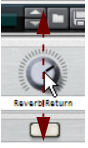
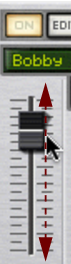
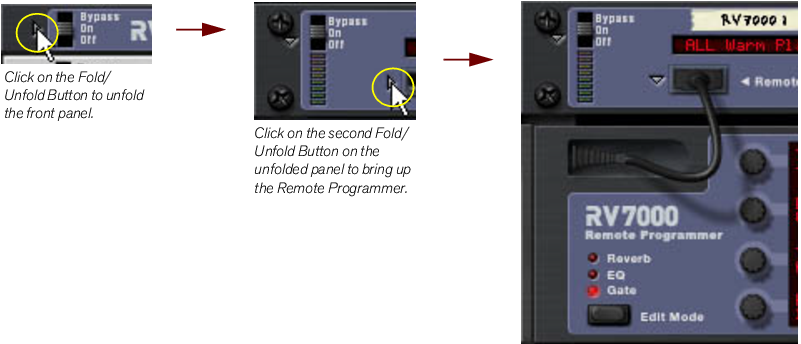
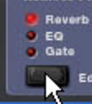
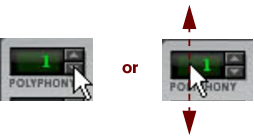
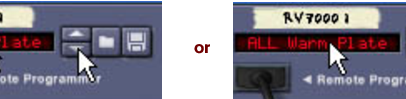
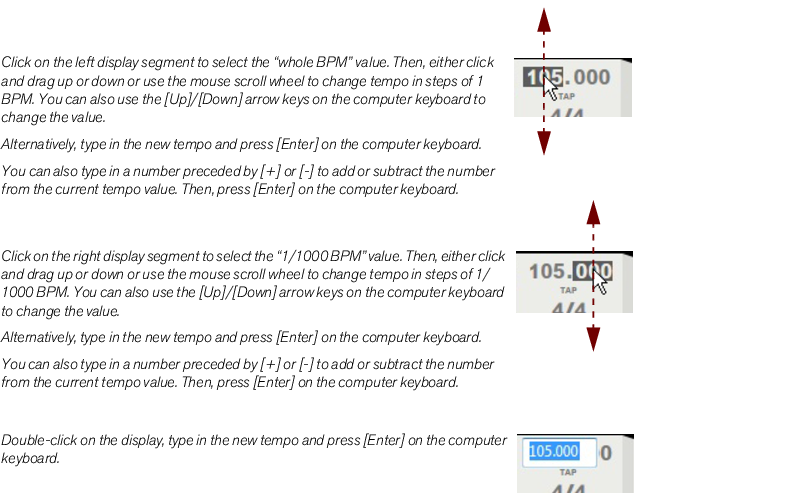
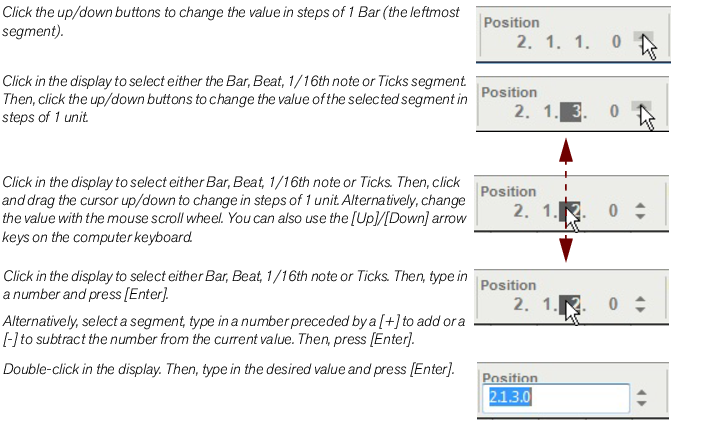
Editing parameters Since a large part of Reason is laid out like “real” hardware devices, such as the Main Mixer, instrument and effect devices etc., almost all controls are designed like their real world counterparts - mixer faders, effect unit knobs, transport buttons, etc. How to adjust these controls is described in the following paragraphs. Knobs To “turn” a knob, point at it, hold down the mouse button and drag up or down (as if the knob was a vertical slider). Dragging upwards turns the knob clockwise and vice versa. If you press [Shift] and drag, the knob will turn slower, allowing for higher precision. You can also adjust the knob precision with the “Mouse Knob Range” setting on the General page in Preferences. This dialog is opened from the Edit menu (or from the Reason menu if you are running Mac OS X). To reset a knob to its default value (usually zero, center pan or similar), press [Ctrl](Win) or [Cmd](Mac) and click on the knob. Faders and sliders To move a fader or slider, click on the handle and drag in the fader/slider direction. You can also click anywhere on the fader/slider to instantly move the handle to that position. If you press [Shift] and drag, the fader/slider will move more slowly, allowing for higher precision. To reset a fader/slider to its default value (usually zero, 100, center pan or similar), press [Ctrl](Win) or [Cmd](Mac) and click on the fader/slider handle. Buttons Many functions and modes are controlled by clicking buttons. Many of the buttons in Reason have a “built-in” LED, or the button itself lights up, indicating whether the button is on or not. Fold/Unfold buttons Fold/Unfold buttons are distinguished by a small triangle at the top to the left on a device. Clicking on a Fold/Unfold button will unfold the device panel so that more controls are visible and can be accessed for editing on the screen. On some devices, such as the RV7000 Advanced Reverb, there are more than one Fold/Unfold button. Clicking on the second Fold/Unfold button on the unfolded front panel will open up the Remote Programmer panel from which more parameters can be accessed: The Fold/Unfold buttons on an RV7000 Advanced Reverb device. Multi Mode selectors Some parameters allow you to select one of several modes. There are two different graphical representations of this in Reason. The multi mode selector type below consists of a button with the different modes listed above it: Click the button to step through the modes or click directly on one of the modes printed on the panel, or click on the corresponding LED, to select mode. The currently selected mode is indicated by a lit LED. The multi mode selector type below is a switch with more than two positions: To change mode, click and drag the switch, or click directly at the desired switch position (just as when adjusting a slider). Numerical controls In Reason devices, numerical values are often displayed in numerical displays with “spin controls” (up/down arrow buttons) on the side. Some parameter values, such as oscillator and LFO waveforms, are displayed graphically in the displays. There are two ways of changing values in these types of controls: By using the up and down buttons on the spin controls. To adjust a value in single steps, click on its up or down arrow button. To scroll a value continuously, click on an arrow button and keep the mouse button depressed. By clicking and holding the mouse button depressed in the actual display and then dragging the mouse up or down. This allows you to make coarse adjustments very quickly. Alpha-numeric controls In Reason, alpha-numeric values and/or device presets are displayed in alpha-numeric readouts with “spin controls” (up/down arrow buttons) on the side. There are two ways to change alpha-numeric/preset values: By using the up and down buttons on the spin controls. To adjust a value or select a preset in single steps, click on the up or down arrow button. To scroll a value continuously, click on an arrow button and keep the mouse button depressed. By clicking and holding the mouse button depressed in the actual alpha-numeric display and selecting from the list that appears. This allows you to make coarse adjustments very quickly or to immediately change to a preset anywhere in the list. This type of control is used to select, e.g., patch and reverb algorithms and some oscillator waveforms. Numerical segment displays In the numerical segment displays on the sequencer Transport Panel and in the sequencer Inspector, values can be edited in a number of different ways. The editing principle is exactly the same for the Transport Panel and Inspector displays, which is shown in the two examples below. Transport Panel segment displays The segment displays of the Transport Panel can be edited as shown in the following Tempo display examples. The Tempo display segments show (from left to right) BPM and 1/1000 BPM: The other segment displays on the Transport Panel can be edited in the same way as described above. Some displays also features up/down arrow buttons. Inspector segment displays The segment displays in the Inspector can be edited as shown in the following Position display examples. The Position display segments show (from left to right) Bars, Beats, 1/16th Note and Ticks: The other segment displays in the sequencer Inspector can be edited in the same way as described above.