NN-XT Sampler : Working with Key Ranges

Working with Key Ranges
About Key Ranges
Each zone can have its own separate key range, the lowest and the highest key that will trigger the sample.
A good example of use for this is when sampling a certain instrument. Sampling of a piano for example is usually performed by making several recordings of different notes at close intervals, and then mapping these samples to separate, contiguous, fairly narrow key ranges. This concept is called multi-sampling.
The reason for this is that if one single sample is played across the entire keyboard, it will most likely sound very unnatural when played too far from its original pitch, since the amount you can transpose a sound without negatively affecting its timbre is very limited.
Setting up Key Ranges
You can adjust the key range of zones in a number of ways:
By Dragging the Zone Boundary Handles
1.
2.
3.
Dotted lines extend from the edges of the zones up to the keyboard area. These lines give you a visual indication of which keys the key range will encompass. There is also an alphanumerical indication at the bottom left of the display.
4.
By using the Lo Key and Hi Key controls
Directly below the key map area you will find the sample parameters. These are used for changing various parameters that affect how the zones are played back. They can affect single or multiple selected zones. In the middle of the sample parameters area are two knobs called “Lo Key” and Hi Key”.
These can be used for setting the low key and the high key of a zone’s key range.
1.
2.
Check the display right above the knobs for an indication of the key. You can also keep an eye on the lines extending from the zone edges to the keyboard area.
Setting key ranges for multiple zones
You can set key ranges for multiple selected zones simultaneously. This can only be done by using the Lo and Hi Key controls. It works as follows:
*
In other words, if the selected zone with edit focus has the high key set to C4, and you change this to D4 by turning the Hi Key knob, all other selected zones will also be extended to D4 as the High Key.
*
The high key can naturally never be set to a value lower than one semitone above its low key setting - the zone would otherwise disappear!
*
A low key can never be set higher than one semitone below the high key in a zone, so if the edit focused zone has a low key above the high key of another zone, the other zone will be scaled to the minimum semitone range.
By Dragging the Zone Boundary Handles on the Tab Bar
As previously described, the area directly below the keyboard area is called the tab bar. This shows the key range for the currently selected zone, and also contains boundary handles.
Dragging a boundary handle on the tab bar.
These handles can be used much to the same effect as when dragging the boundary handles in the key map display. However, the handles on the tab bar can change the key range of multiple zones at the same time.
The following applies:
*
*
*
In the example in the picture above, the zone in the middle has edit focus. Its left handle (the low key) is placed differently from any of the other zones, but all of the zones have the same high key setting. This means that...
Moving Zones by Dragging the Zone Boxes
You can also move entire zones horizontally, thereby changing their key ranges.
1.
You can move several zones simultaneously.
2.
3.
Dragging multiple zones.
Moving Zones by Dragging in the Tab Bar
You can also move a zone by dragging anywhere between the zone boundary handles on the tab bar. When you do, the surrounding zones will be affected just as when dragging the boundary handles in the tab bar (see above).
This can be used to “slide” a zone in relation to its surrounding zones, as the picture example below shows (before and after dragging).
About the Lock Root Keys function
Normally, when you move zones (as described above), the root note of the zone(s) you move will change accordingly. In other words, the zone(s) will be transposed. If this is not desired, you can activate the Lock Root Keys function prior to moving the zone(s) by clicking on the button above the key map display.
Moving zones without changing their root notes can be used for some interesting effects, since it will completely change the timbre of the sample(s) as they are played back.
About the Solo Sample function
The Solo Sample function lets you play a selected sample over the entire keyboard and disregarding any velocity range assigned to the sample. All other loaded samples are temporarily muted.
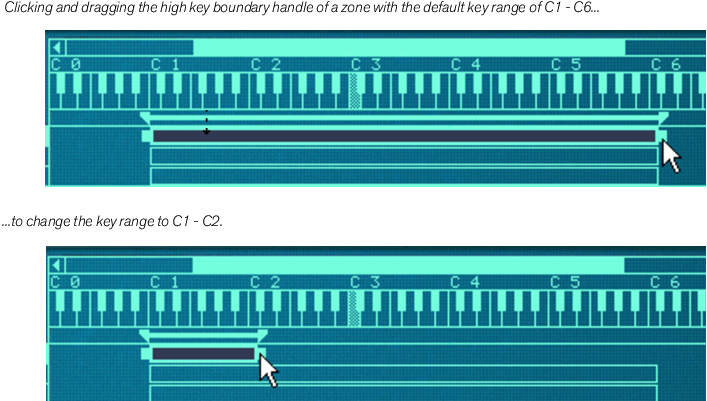
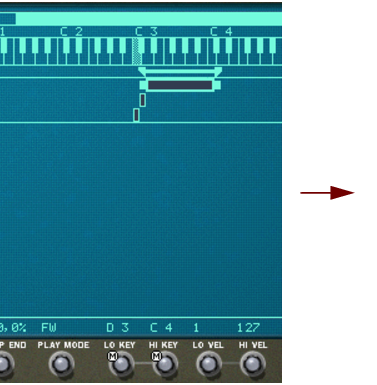
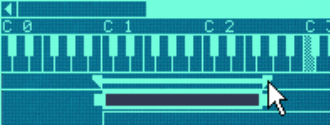
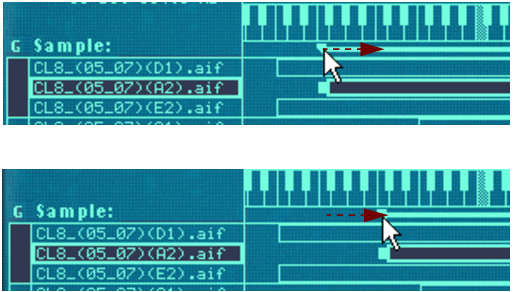
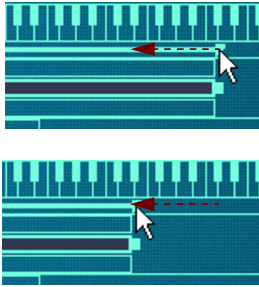
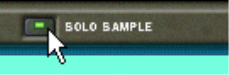
This is useful if you for example want to check how far up and down from its root key a sample can be played on the keyboard before starting to sound “unnatural”. The solo sample function can therefore be useful as a guide for setting up key ranges, as described in “Setting up Key Ranges”.
1.
2.
3.
Sorting Zones by Note
The Edit menu and the NN-XT context menu contains an item called “Sort Zones by Note”. This option lets you automatically sort the selected zones in descending order according to their key ranges.
When you invoke this option, the selected zones will be sorted from top to bottom in the display starting with the one with the lowest range.
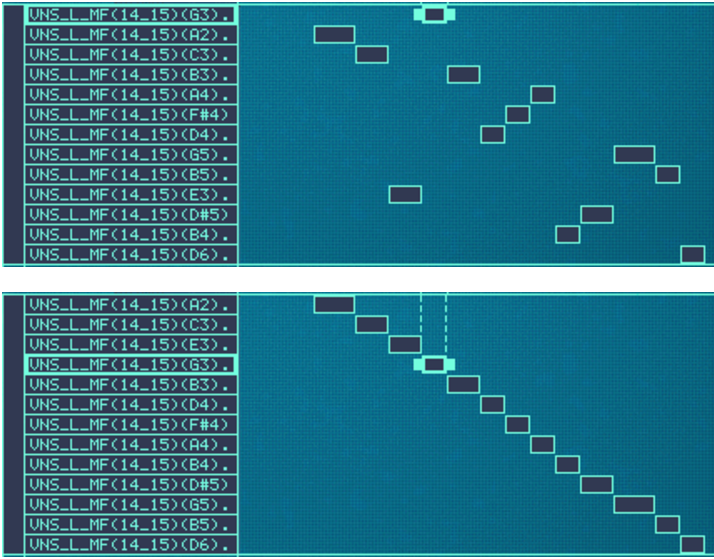
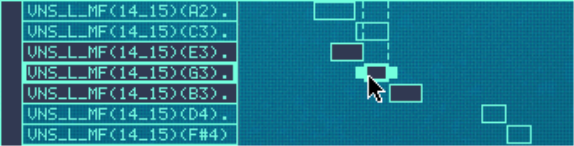
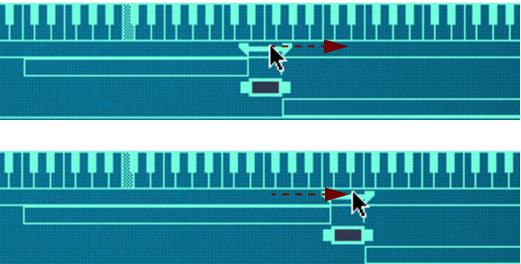
Note however, that the sorting is done strictly on a group basis. That is, only zones that belong to the same group can be sorted in relation to each other.
Before sorting and after.
If two zones have the same key range, they are sorted by velocity range.

NN-XT Sampler : Working with Key Ranges