Notes can be edited using the mouse in Edit Mode. It’s also possible to edit notes by using the functions on the Tools tab in the Tool Window. Notes can also be numerically edited in the Inspector, as described in “Note and automation editing in the Inspector”.

|
|
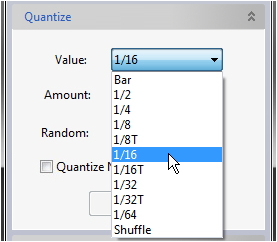
If you want to restrict note input to certain note values (e.g. 1/16th notes), activate Snap (see “Snap”) and set the snap value accordingly.
|

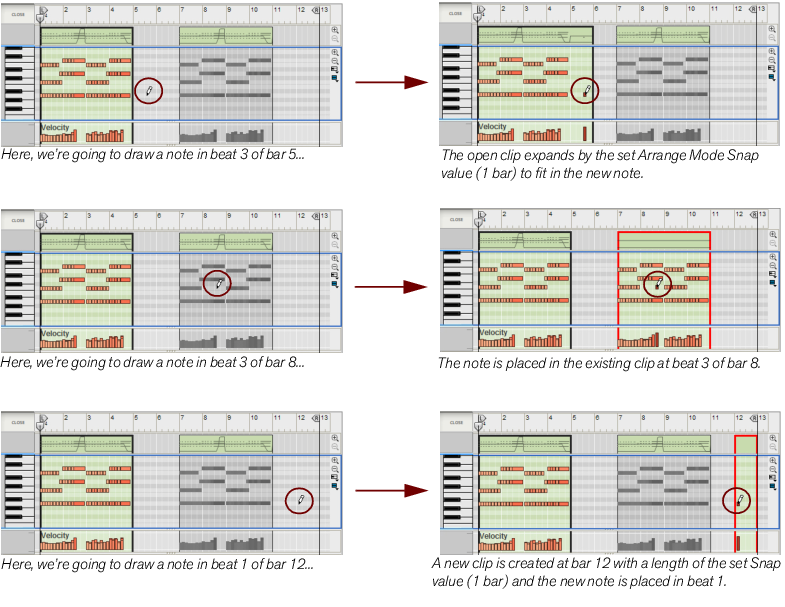
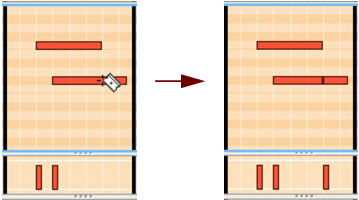
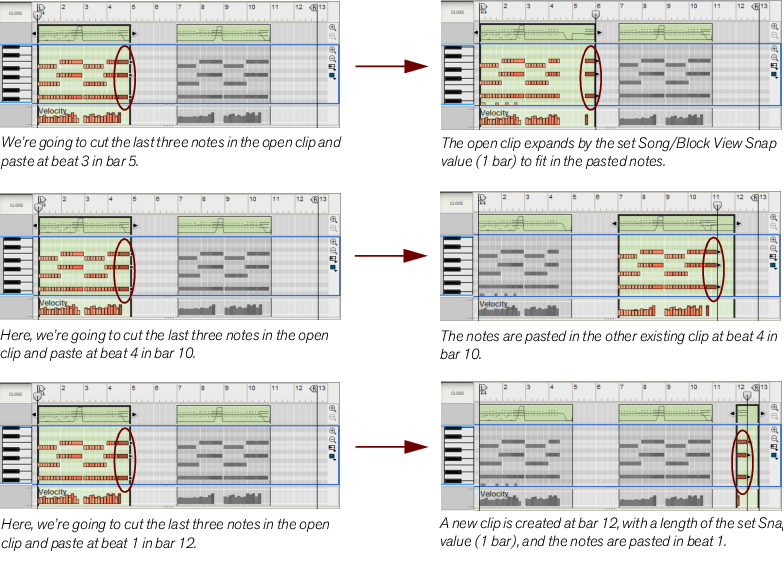
A note will be inserted at the closest Snap value position. By default, the note will be given the Velocity value ‘100’. (This can be edited afterwards according to the descriptions in “Editing note velocity”). If an open or closed clip is already present on the Note Lane, at the position where you draw the note, the note will be placed in that clip. If no clip is available, refer to “About drawing notes outside an open clip” and “About drawing notes outside a closed clip” below.
|
|

|
•
|
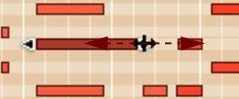
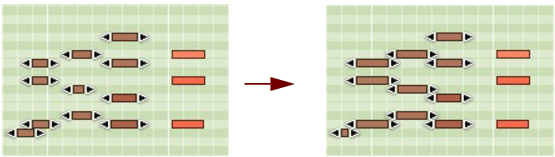
If Snap is on (see “Snap”), the beginning and/or end of the note will be magnetic to the (absolute) Snap value positions.
|
You can also edit the length of notes numerically in the inspector. See “Note and automation editing in the Inspector”.

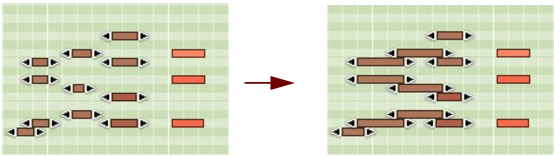
If several notes are selected, all will be moved. If Snap is on (see “Snap”), the moved events will keep their relative distance to the Snap value positions. For example, if the Snap value is set to “Bar”, you can move the selected notes to another bar without affecting their relative timing.
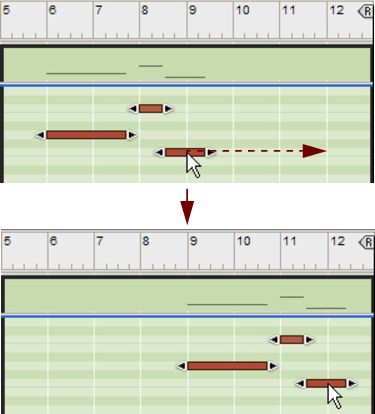
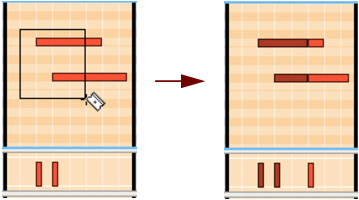
If you nudge notes outside the boundaries of an open clip, the notes will belong to the open clip, but become masked since they are nudged outside the clip boundaries. The “Keep Events in Clip While Editing” setting has no effect when nudging notes. If you want to move notes between clips, or to a new clip, you have to do that using the Selection Tool as described in “About moving notes outside or between clips”.
It’s possible to move defined notes in a clip to new clips on new, additional lanes. See “Extract Notes to Lanes”.
You can also edit the note positions and pitches numerically in the inspector. See “Note and automation editing in the Inspector”.
|
|
It’s possible to duplicate defined notes in a clip and automatically place them on new, additional lanes. See “Extract Notes to Lanes”.
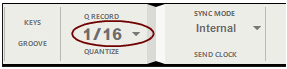
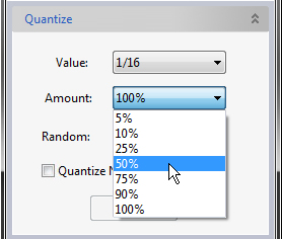
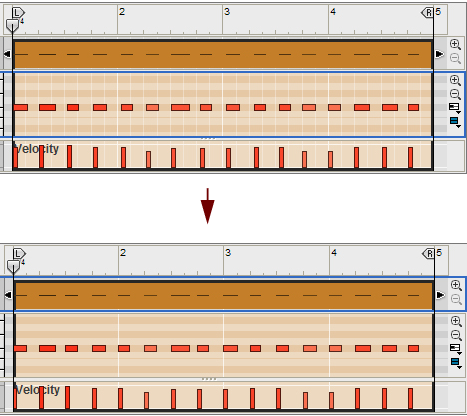
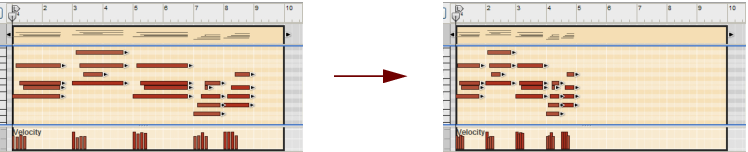
The “Quantize” function on the Transport Panel and on the Sequencer Tools tab in the Tool Window is normally used for applying quantization to notes - but can also be used for quantizing recorded audio. Clicking the Quantize or Apply button will automatically align the start positions of the selected notes or audio slices to a pre-defined, absolute grid. You can also choose to automatically quantize MIDI notes as they are being recorded - see “Quantizing notes during recording”.
A more flexible way of doing this for notes and note clips is to use the ReGroove mixer - see “The ReGroove Mixer” chapter for details.
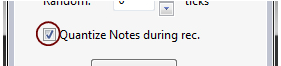

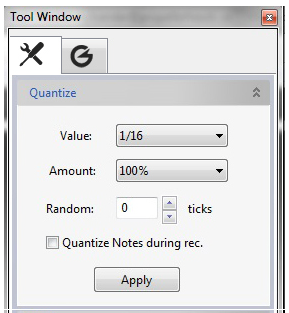
Any notes recorded after having activated this function will be automatically quantized to the current settings on the “Quantize” pane in the Tool Window, see “Quantize”.
|
|
|
|
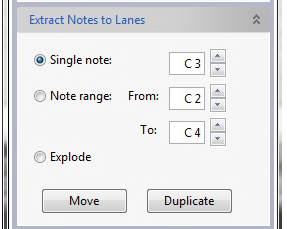
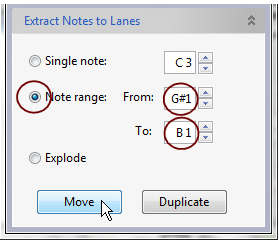
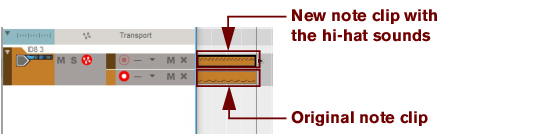
The “Extract Notes to Lanes” function on the Sequencer Tools tab in the Tool Window is used for moving or duplicating user-defined notes of a certain pitch, or notes within a defined pitch range, to a new note clip on a new, additional note lane. This function is very useful if you, for example, have recorded a drum track, with all notes in the same clip, and then want to extract individual drum sounds (note pitches in this case) to separate lanes to be able to edit them more easily - or to apply ReGroove channels (see “The ReGroove Mixer”).
Since the Extract Notes to Lanes function applies to selected clips and not to selected notes, you have to click in the Clip Overview to enable the function. (In the Song/Block View, you just select the clip by clicking on it).


|
|
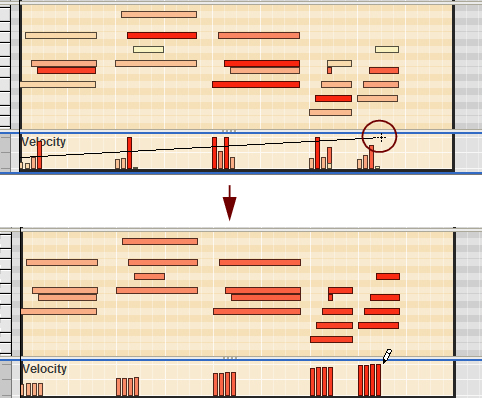
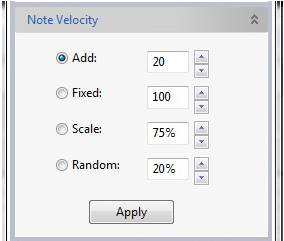
You can also edit velocity values numerically in the Inspector. See “Note and automation editing in the Inspector”.
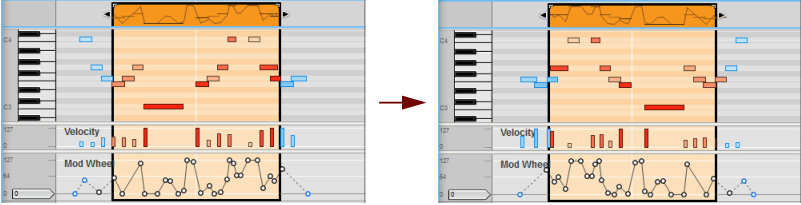
This is done in the Song/Block View. If the clips are on the same lane, it can also be done in the Comp Editor. See “Reversing audio clips” for more details about reversing audio clips.