Working with the Rack : Rack device procedures

Rack device procedures
The rack is where you create and configure your devices, and make parameter settings. This section describes all the procedures for managing the rack, that is, procedures and techniques common to all devices.
Navigating in the rack
The rack, here with three rack columns visible.
The rack houses all the devices you use in your song. To make it easier to overview the devices, the rack can contain several rack columns next to each other. To navigate in the rack, use one of the following methods:
*
Just clicking in the Rack Navigator will directly scroll to the corresponding position in the rack.
*
Hold down [Shift] and use the scroll wheel to scroll horizontally in the rack.
*
Note that the rack area must have Edit Focus, i.e. there must be a frame surrounding the rack area. Set Edit Focus by clicking anywhere in the rack area.
*
Note that the rack area must have Edit Focus.
*
Resizing and detaching the rack
*
This will shrink the Main Mixer and/or sequencer areas and make more of the rack visible.
*
Dragging the divider to the left will expand the Rack Navigator area and enlarge the devices, making it easier to get a good overview of all devices in your rack.
*
The rack header.
*
The Show/Hide icon on the rack header.
*
This will place the rack in a separate window. (See “The Rack” for more info.)
The rack Detach icon.
*
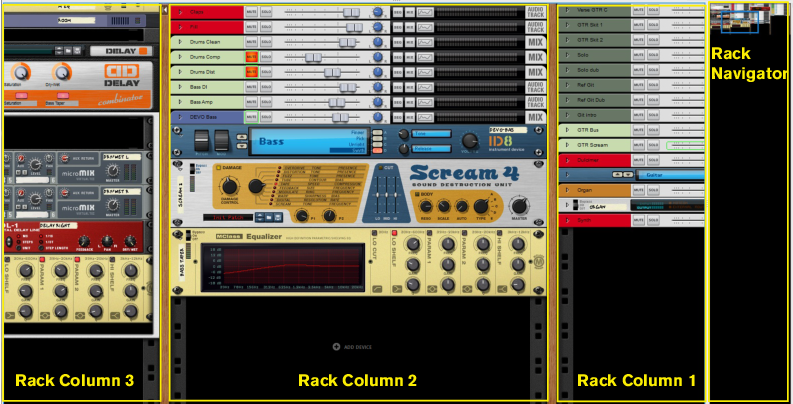
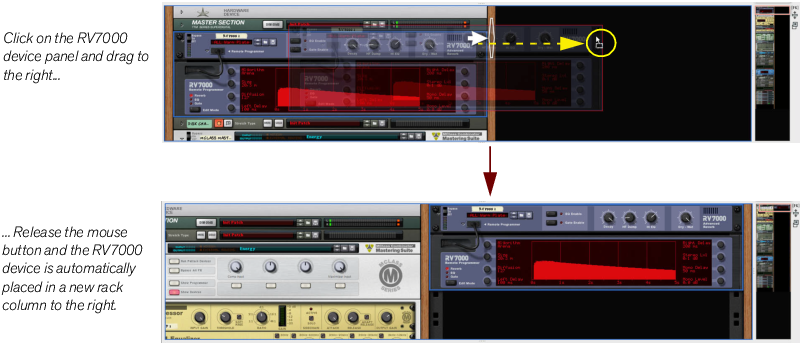
See also “Creating new rack columns” for information on how to create several rack columns.
About using the Browser in the detached rack
When the rack is detached, it also features a second instance of the Browser. The Browser is available to the left in the detached rack.
*
The Show/Hide icon on the Browser header in the detached rack.
This means you can be in two completely different locations (or palettes) in the two Browsers.
About Device Groups
A Device Group is a series of interconnected devices that “belong together”. A Device Group could be, for example, an instrument device connected to an effect device and then to a Mix Channel device.
A Device Group consists of the following:
*
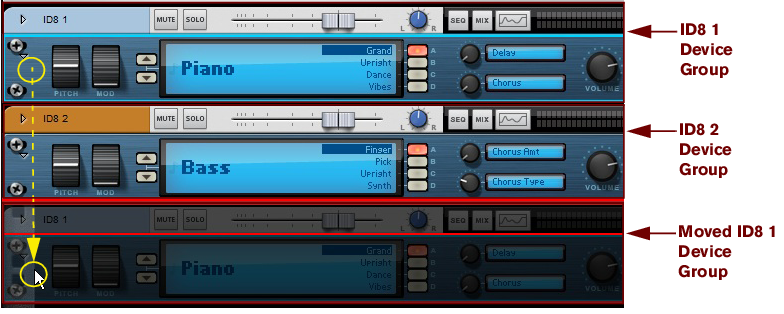
By default, when you create an Instrument device, a new (or currently unused) Mix Channel device will be automatically connected to the Instrument device, as described in “Creating devices”. In this situation, the Instrument device and the connected Mix Channel device will now be considered a Device Group - with the Instrument device as the Source device.
If you want to keep all devices in a Device Group physically together in the rack (e.g. if you want to move all devices in the group), there is an option “Auto-group Devices and Tracks” on the Options menu.
The “Auto-group Devices and Tracks” option.
The advantage of using the “Auto -group Devices and Tracks” option is that it’s much easier to get a good visual overview over what devices are connected to each other and associated with specific sequencer tracks and with a specific channel strip in the Main Mixer. It’s also easier to rearrange devices in the rack since all devices in the Device Group will move together if one device in the Device Group is moved.
The example below shows two ID8 devices connected to one Mix Channel device each. Let’s say you want to move the ID8 1 device to another position in the rack. This is what will happen:
1.
2.
As you can see, both the ID8 1 device and its connected Mix Channel device are moved together, as a group, to the new destination.
*
Creating devices
Devices can be created in a number of different ways. These first methods apply to any device types:
*
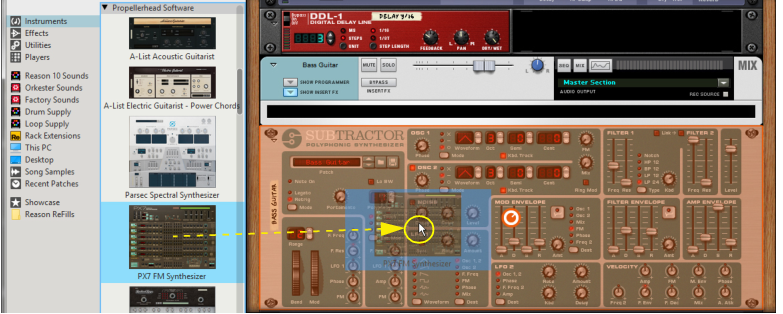
The devices are sorted in four different groups: Instruments, Effects, Utilities and Players. The Utilities group contains device types such as mixers, modulation devices, etc. In each device type group the devices are listed in the following sections: Reason Devices, and then by Rack Extension and/or VST manufacturer in alphabetical order. The Players group is a little special; it contains a number of MIDI “generators” that can be used when recording Instrument tracks in the sequencer, see “Working with Players”.
A device can be dropped in the rack or in the Track List in the Sequencer. As you drag a device to the rack or Sequencer Track List, a +-sign is shown together with an orange divider to indicate where the device will be placed:
Adding a PX7 FM Synthesizer device by dragging from the Instruments device palette and dropping in the rack.
*
When you drop a patch in the rack or in the Track List in the Sequencer the corresponding device is automatically created in the rack.
*
*
Any device type can be created. The “Create” menu is available both on the main menu and on the rack and device context menus and is divided into the three groups Instruments, Effects and Utilities. At the top of each group (Instruments/Effects/Utilities) are the devices you create most often. Below are all available devices, on sub-menus per manufacturer.
Automatic browse focus can be switched off if you like. This is done on the General tab in Preferences, see “New devices get browse focus”.
For more information about the auto-routing features, see “Automatic routing”.
Depending on what type of device you’ve created, and also the “Auto-Group Devices and Tracks” setting, the results will differ:
If no device is selected, the new device is added at the bottom of the rack.
This means a device might not end up below the selected device in the rack, but below that device's Device Group.
*
Instrument device specifics
The following additional methods can be used for creating Instrument devices:
*
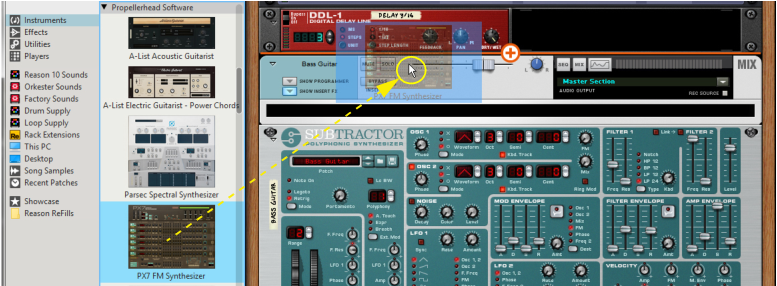
This will show the Instruments palette in the Browser. Here you can choose the Instrument device you want to create - see “Create Instrument/Create Effect”.
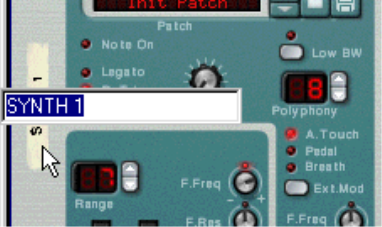
The track, the Mix Channel device and its channel strip will be given the same name as the created Instrument device. Master Keyboard Input will also automatically be set to the new track, allowing you to immediately play the created Instrument device via MIDI (see “Master Keyboard Input”). By default, the Instrument device and Mix Channel device will be treated as a “Device Group” from here on (see “About Device Groups”).
*
Audio Track device specifics
The following additional methods can be used for creating Audio Track devices:
*
This will create an Audio Track device (with its corresponding channel strip in the Main Mixer) and a sequencer track.
Mix Channel device specifics
Effect devices specifics
The following additional method can be used for creating Effects devices:
*
This will show the Effects palette in the Browser. Here you can choose the Effect device you want to create - see “Create Instrument/Create Effect”.
The results when creating Effect devices depend on the following criteria:
Mixer device specifics
Selecting devices
Some operations, e.g. cutting, copying, moving and deleting devices (see “Cut, Copy and Paste devices” and “Deleting devices”), require that you select one or several devices in the rack. This is done according to the following:
*
The selected device is displayed with a colored border (based on the color scheme selected for your operating system).
*
In other words, [Shift]-clicking a device selects it without de-selecting any other selected devices.
*
*
All other selected devices remain selected.
*
When you use this method, Reason will automatically scroll the rack so that the selected device is fully visible. This is a quick way of “stepping through” the rack. Narrow devices (e.g. half-width devices such as some effects) are ordered left-to-right, i.e. pressing the down arrow key will step through the devices from left to right before moving on the next device row.
*
This allows you to select a range of devices.
*
In other words, you don’t have to select a device as a separate operation before editing its parameters.
Playing devices from the rack
When you create an instrument device it automatically gets a corresponding sequencer track, and Master Keyboard Input is set to that track so you can play the instrument device from your MIDI keyboard. You can change Master Keyboard Input by selecting another sequencer track, but you can also change Master Keyboard Input from the rack. This is useful if you, for example, have the rack detached and maximized, so you can’t see the sequencer area.
When you select a device in the rack it is surrounded by a colored border. At the top left of the border is a Master Keyboard Input tab:
The Master Keyboard Input tab on a selected ID8 device in the rack.
*
Master Keyboard input is automatically switched in the sequencer as well and you can now play the device from your MIDI keyboard:
Master Keyboard Input set from the ID8 1 device in the rack.
When you play the device, incoming MIDI is indicated by the Master Keyboard Input symbols on the device in the rack as well as on the sequencer track.
About selecting all devices in a Device Group
To select all devices in a Device Group, do as follows:
1.
2.
All devices in the Device Group will be selected as indicated by the colored borders around the devices.
Deleting devices
To delete one or several devices, select them in the rack and use one of the following methods:
*
An alert appears asking you to confirm the deletion. Any cable connections to the device will also be deleted (or re-routed).
*
*
*
An alert appears asking you to confirm the deletion. This will delete the devices together with the associated sequencer track(s) also if the “Auto-group Devices and Tracks” option isn’t selected. (It’s possible to have devices without associated tracks but it is not possible to have a sequencer track without an associated device.)
*
*
*
Re-ordering devices
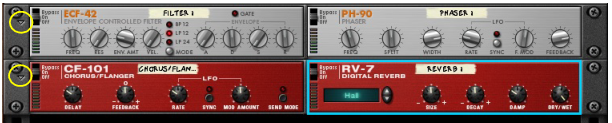
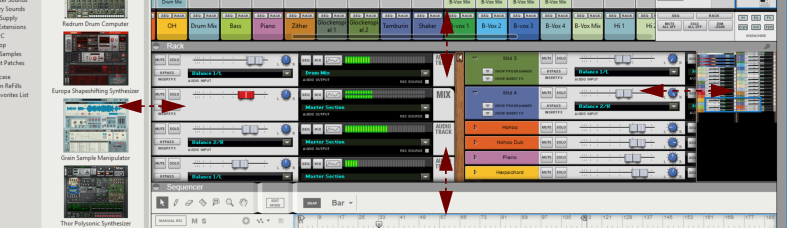
If you want to move an instrument device to another position in the rack, you probably also want its Mix Channel device and connected effects to move along with it. If the “Auto-group Devices and Tracks” on the “Options” menu is selected, all devices in the Device Group will follow along when you drag and drop a device included in a Device Group. However, it’s still possible to re-order devices within each Device Group. See “About Device Groups” for more details. See also “About the “Sort Selected Device Groups” function” for information about automatic sorting of several Device Groups.
If the “Auto-group Devices and Tracks” on the “Options” menu is not selected, you can re-order and move devices individually in the rack - even outside the Device Groups:
1.
2.
3.
An orange line indicates where the device(s) will be positioned. Note that when re-ordering devices with smaller width, the line can be to the left of a device (indicating that the moved device will be placed before the other device) or to the right of a device (indicating that the moved device will be placed after the other device).
*
In this example an RV-7 reverb device is moved to two different destinations:
4.
The device(s) are moved to the new position and the other devices in the rack are adjusted to fill up the gap(s).
*
*
Re-routing devices
*
This allows you to e.g. change the order of effect devices in a signal chain by Shift-dragging them.
See “Automatic routing” for more info on auto-routing.
Creating new rack columns
It’s possible to move devices, or Device Groups, to new rack columns. This is very useful if your rack starts to get crowded, or if you want to arrange your devices in separate rack columns to get a better overview.
By default, when you create a new empty Song document, the rack consists of a single rack column featuring the Reason Hardware Device and the Master Section device. When you create new devices from the “Create” menu, these will automatically be placed in that rack column.
By dragging and dropping devices to either side (left or right) of the original rack, you can move the devices and at the same time create a new rack column. You can create as many rack columns as you like - the only condition is that at least one device must be present in a neighboring rack column. In other words, you can’t create empty rack columns.
In the example below, we drag and drop an RV7000 reverb device to the right of the original rack:
A large white arrow symbol appears on the right wooden rack side of the original rack column to indicate that the device is about to be moved to a new rack column.
About the “Sort Selected Device Groups” function
When you are working with Device Groups (see “About Device Groups”), there is a very nice feature which allows you to visually organize and re-order the Device Groups, Main Mixer channel strips and sequencer tracks. With the “Sort Selected Device Groups” function on the Edit menu, it’s possible to sort Device Groups and Main Mixer channel strips according to the current sequencer track order - or vice versa, depending on what’s currently selected. To sort the Device Groups in the rack, and the channel strips in the Main Mixer, according to the current sequencer track order, proceed as follows:
1.
Tracks are marked with darker colors to indicate they’ve been selected.
2.
Now all Device Groups and channel strips in the Main Mixer will be automatically re-ordered according to the current track configuration in the sequencer. The topmost sequencer track will have its associated Device Group moved to the top in the rack. The remaining Device Groups will be re-ordered according to the remaining track order in the Track List. The Main Mixer channel strips will also be re-ordered according to the sequencer track order.
Replacing devices
If you want to replace an Instrument, Effect or Player device in the rack with another device of the same category, proceed as follows:
1.
*
2.
The device to be replaced is dimmed in orange and gets a “replace” symbol in the center:
Replacing a Subtractor with a PX7 FM Synthesizer device.
3.
The new device is automatically routed like the previous device. The Mix Channel now also gets the name of the current patch in the new device. The new device also gets “browse focus” in the Browser, see “Loading patches”.
*
*
*
Duplicating devices
Duplicating devices will have different results depending on the “Auto-group Devices and Tracks” setting on the Options menu (see “About Device Groups”):
*
*
A duplicate (copy) of the device(s) or Device Group(s) will be created. New tracks for the device(s) or Device Groups will also be created in the sequencer.
*
See “Automatic routing”.
Cut, Copy and Paste devices
Selected devices or Device Groups can be moved or duplicated using the Cut, Copy and Paste Device functions on the Edit menu or device context menu. This allows you to copy one or several devices (such as an instrument device and all its “insert” effects) from one Reason Song document to another. Cutting/Copying and Pasting will have different results depending on the “Auto-group Devices and Tracks” setting on the Options menu (see “About Device Groups”):
That is, Cut moves the devices/Device Groups to the clipboard (removing them from the rack) while Copy creates copies of the devices/Device Groups and puts these in the clipboard memory, without affecting the rack.
*
All devices in the Device Group will be cut/copied and pasted with preserved connections (in the same Song or in another Song document).
If no device is selected, the pasted devices/Device Groups will appear at the bottom of the rack column.
*
The rules are the same as when moving or duplicating devices by dragging and dropping. See “Routing Audio and CV” for more information about automatic and manual routing.
Naming devices
Each device has a “tape strip” which shows the name of the device. When you create a new device it is automatically named according to the current patch in the device. Devices that don’t use patches are automatically named according to the device type, with an index number (so that the first ID8 device r you create is called “ID8 1”, the next “ID8 2” and so on). If you like, you can rename a device by clicking on its tape strip and typing a new name (up to 16 characters).
For instrument devices connected to Mix Channel devices, the device names are automatically copied to the tape strips for the corresponding Mix Channel devices and their channel strips in the Main Mixer, as well as on their corresponding sequencer tracks. Similarly, the names of the FX Returns in the Main Mixer show the names of the effect devices connected to the corresponding FX Return inputs.
Folding and unfolding devices
If you don’t need to edit the parameters for a device, you can fold the device to make the rack more manageable and to avoid having to scroll a lot.
*
The “Fold/Unfold” button on an RV7000 device.
*
The “Fold/Unfold” buttons for devices of smaller width.
*
Conversely, hold down [Alt](Win) or [Option](Mac) and click the “Fold/Unfold” button of a folded device to unfold all devices in the current rack column.
However, if you want to make a connection to a folded device, you can drag a cable to it and hold it there for a moment. This will cause the folded device to automatically unfold and let you make the connection.

Working with the Rack : Rack device procedures