The ReGroove Mixer : Working with grooves

Working with grooves
Applying grooves to your music
Follow this example to learn basic ReGroove mixing techniques and hear the effect that various groove parameters have on your music.
1.
2.
For the most obvious effect the track should contain a drumbeat based on straight (as opposed to shuffled) sixteenth notes. A hi-hat lane, for example, might be a good source for experimentation.
3.
*
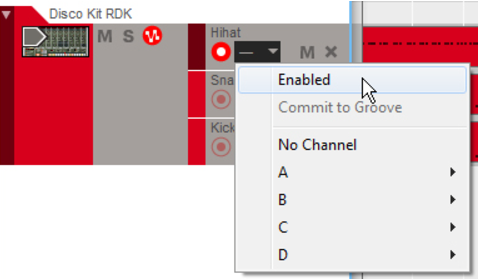
This is useful for comparing with the original, ungrooved beat. If you want to do this for several note lanes set to a particular ReGroove channel, use the “On” button for the channel in the ReGroove mixer instead (see “On Button”).
*
4.
5.
The music on that note lane (and any other note lane assigned to the same ReGroove channel) will start playing with a shuffle feel.
6.
*
7.
8.
9.
10.
11.
12.
Note that none of the patches in the Vinyl folder make use of Note Length, so the Note Length Impact will have no effect.
*
Commit to Groove - making the grooves “permanent”
When you assign a ReGroove channel to a note lane, this will only affect how the notes play back. The notes will still be shown with their original, ungrooved positions if you open the note clip.
If you want to edit grooved notes (e.g. adjust timing and velocity manually), it’s useful to first actually move the notes to the grooved positions, permanently. This is done with the “Commit to Groove” function:
1.
2.
All notes on all lanes on the track will be moved to their grooved positions, and the Groove Select pop-up will be reset to “No Channel”.
If you play back the track, it will sound exactly the same as before. If you look at the notes in Edit mode, their positions, length and velocity will now match what you hear.
Using Commit to Groove on some lanes only
“Commit to Groove” affects entire tracks, including all note lanes if there are several. If you only want to make the groove permanent for one of the lanes, here’s a workaround:
1.
This bypasses the ReGroove channel for those note lanes, but retains the channel selection.
2.
Only the note lanes with ReGroove Enabled will be affected.
3.
Creating your own ReGroove patches
To create your own ReGroove Patch, proceed as follows.
1.
Alternatively, you could import a MIDI File with the desired effect, or use the “Copy Loop To Track” function on a Dr. Octo Rex device to extract the notes from a REX loop.
*
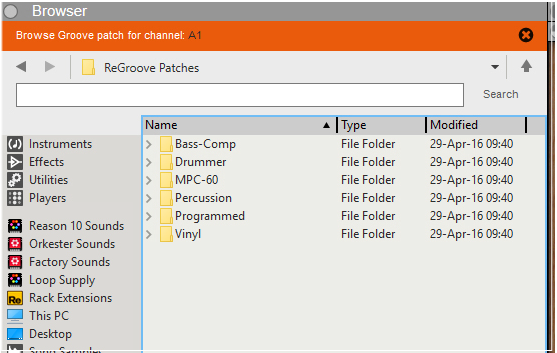
To learn some of the characteristics of a good groove-making clip, see “Tips for selecting the best Groove-Making Clips” below.
2.
3.
4.
Alternatively, you could select “Get Groove From Clip” from the clip's context menu.
5.
For a good starting point, you can simply leave them at their default settings.
6.
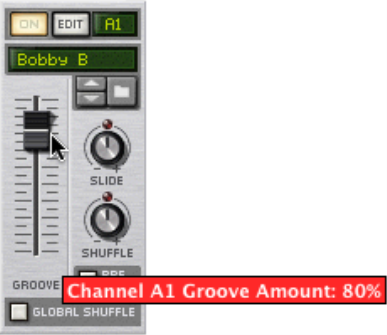
Your ReGroove patch is now ready to use. As discussed in “Applying grooves to your music”, simply route one or more note lanes to the ReGroove channel assigned to your new groove, and pull up the Groove Amount fader on that channel.
Tips for selecting the best Groove-Making Clips
The following tips will help insure that your custom grooves work their best:
*
If there are any sixteenth note gaps in your source material, there will be corresponding gaps in your groove patch. This means, when you apply the groove to a note lane, some notes will be grooved and some (those that fall in the gaps) will not.
*
If you don't want dramatic shifts in dynamics, avoid having widely varying velocities in your source clip.
*
We recommend that you adjust your source clip to an exact number of bars before creating a groove patch.
*
You can create and use grooves that are an odd number in length (3, 7, 13, etc.), but unless you're well organized and plan to use these grooves in specific polyrhythmic pieces, their general effect on most tracks will be somewhat unpredictable.

The ReGroove Mixer : Working with grooves