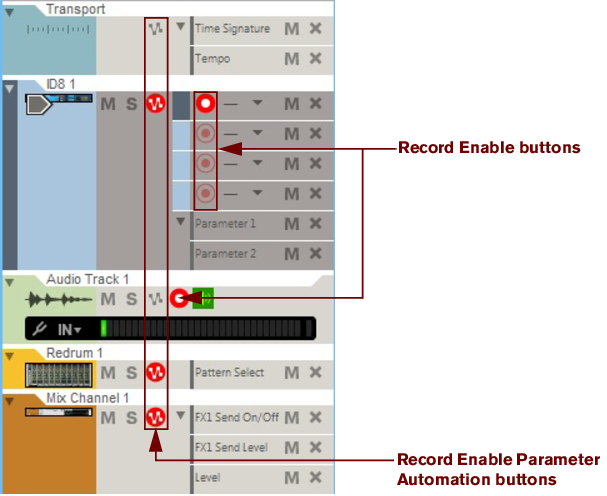
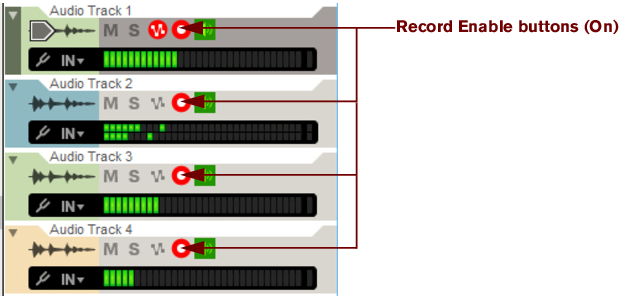
Activated Enable Record and Enable Record Parameter Automation buttons are indicated with a red color. Recording can be simultaneously enabled on an unlimited number of audio tracks (limited only by the computer’s processing and hard disk performance) - plus one note lane on an instrument track. However, if you have locked several MIDI keyboard controllers to specific instrument devices in the rack - using Remote (see “Locking a surface”) - you can record MIDI on these instrument tracks simultaneously. Recording of parameter automation can be simultaneously enabled on as many tracks as you like.

Selecting an audio track will automatically record enable the track if you have selected “Standard” mode in the “Master Keyboard Input” section on the “Keyboard and Control Surfaces” page in the Preferences dialog (see “The Master Keyboard Input setting”) - and if the Manual Rec button in the Track List is Off, see “About the Manual Rec function”.
Also, depending on the setting in the “Monitoring” section on the “Audio” page in Preferences, monitoring of the input signal to the audio track may, or may not, be automatically activated - see “Monitoring”.
If you have selected “Standard” mode in the “Master Keyboard Input” section on the “Keyboard and Control Surfaces” page in the Preferences dialog (see “The Master Keyboard Input setting”), selecting an instrument track will automatically set Master Keyboard Input to that track - if the Manual Rec button in the Track List is Off, see “About the Manual Rec function”. An instrument track that has Master Keyboard Input will automatically be record enabled, and will also be enabled for parameter automation recording, indicated by the red Record Enable Parameter Automation button.
|
|
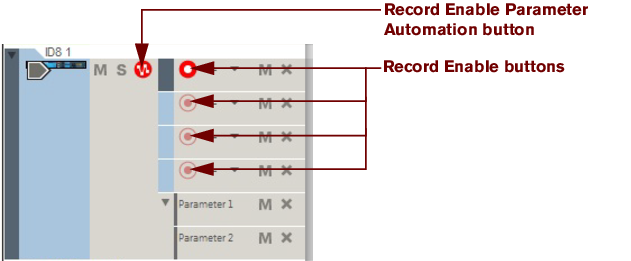
Only one note lane on one instrument track can have Record Enable active at a time, unless you have locked additional MIDI keyboard controllers to specific instrument devices in the rack (see “Locking a surface” in the Remote chapter). If you only have one MIDI keyboard controller (assigned as Master Keyboard), you can only record notes on one note lane at a time (see “Setting Master Keyboard Input”).
|
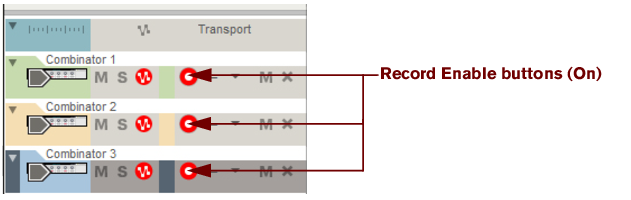
If you have locked additional MIDI keyboard controllers to specific instrument devices in the rack (see “Locking a surface” in the Remote chapter), the corresponding tracks for all these locked devices are automatically record enabled - if the Manual Rec button in the Track List is Off, see “About the Manual Rec function”. These additional record enabled tracks are all displayed with the gray “Master Keyboard Input” symbol to the left of the device icon in the track list, and their Record Enable buttons are also automatically switched on. The track with “normal” Master Keyboard Input is also indicated with the gray Master Keyboard Input symbol to the left of its device icon.


If you change your mind and want to record audio on an audio track, you have to manually record enable it by clicking its Record Enable button as described in “Record enabling an audio track”. Alternatively, switch off the Manual Rec button to enable the automatic record enabling again.

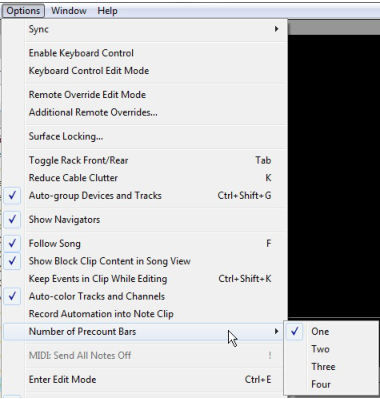
Pattern automation can be recorded on tracks associated with pattern based devices such as the Redrum Drum Module, Dr. Octo Rex Loop Player or Matrix Analog Pattern Sequencer. Enabling pattern automation works in the same way as enabling regular parameter automation (see “Record enabling parameter automation”).

|
|

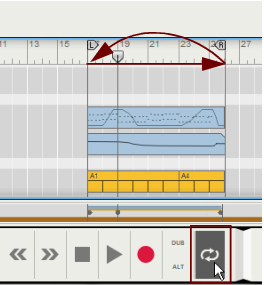
The behavior when recording in loop mode differs depending on what you’re recording - audio, MIDI or parameter automation. Refer to “Recording audio in Loop mode”, “Recording notes in Loop mode” and “Recording parameter automation in Loop mode”.
The following description applies to all types of recording: audio, MIDI and parameter automation. For specific details of audio, MIDI and parameter automation recording, refer to “Recording audio”, “Recording notes”, “Recording performance controller automation” and “Recording parameter automation”.
|
1.
|
|
2.
|


|
|
If you are going to record complex/difficult takes, a good suggestion is to lower the song tempo during recording and then speed up the song to normal tempo again during playback. For audio tracks, Reason features very sophisticated functions for audio stretching. Audio stretch enables you to alter the song tempo up or down without changing the pitch of the recorded audio. See “About tempo changes and tempo automation of audio tracks” for more details.