Redrum Drum Computer : Programming patterns

Programming patterns
Pattern basics
Redrum contains a built-in pattern sequencer. Unlike the main sequencer in Reason, the Redrum sequencer repeatedly plays back a pattern of a specified length. The typical analogy in the “real world” is a drum machine which plays drum patterns, usually one or two bars in length.
Having the same pattern repeat throughout a whole song may be fine in some cases, but most often you want some variations. The solution is to create several different patterns and program pattern changes (automatic switching from one pattern to another) at the desired positions in the song.
How the Redrum pattern sequencer integrates with the main sequencer
The built-in pattern sequencer in the Redrum interacts with the main Reason sequencer in the following ways:
*
If the Tempo track (see “Recording tempo automation”) is used, Redrum will follow this.
*
*
If the Redrum has a track in the sequencer and you mute this track, Redrum will automatically be muted as well. This is indicated by a Mute indicator on the device panel. If there are several note lanes on the Redrum track, their respective mute status will not be indicated on the device panel.
This Redrum device is muted.
*
This starts the built-in pattern sequencer in the device. To stop playback, click the Run button again or click the Stop button on the Transport panel.
The Run button on the Redrum.
*
*
In other words, you can record or create pattern changes in the main sequencer, and have them occur at the correct position on playback.
*
You can combine the built-in pattern playback with playback from the main sequencer or via MIDI. For example, this allows you to add variations or fills to a basic pattern.
It is also possible to disable the pattern sequencer totally, converting the device to a pure sound module. This is done by deactivating the Enable Pattern Section switch.
Selecting patterns
The Redrum has 32 pattern memories, divided into four banks (A, B, C, D).
The Bank and Pattern buttons for the Redrum pattern sequencer.
*
If you like, you can assign computer key commands and/or MIDI messages to pattern selection.
*
Nothing happens until you click the Pattern button.
*
If you automate pattern changes in the main sequencer, you can make them happen at any position - see “Recording pattern automation”.
*
However, you can move patterns from one location to another (even between songs) by using the Cut, Copy and Paste Pattern commands.
Pattern tutorial
If you are unfamiliar with step programming patterns, the basic principle is very intuitive and easy to learn. Proceed as follows:
1.
2.
If you like, use the Clear Pattern command on the Edit menu or device context menu to make sure.
3.
4.
There will be no sound, as no pattern steps have been recorded yet. But as you can see, the LEDs over the Step button light up consecutively, moving from left to right, and then starts over. Each Step button represents one “step” in the Pattern.
5.
The button lights up, indicating that this channel and the drum sound it contains is selected.
6.
The selected sound will now play every time Step 1 is “passed over”.
7.
Clicking on a selected (lit) step button a second time removes the sound from that step and the button goes dark again. You can click and drag to add or remove steps quickly.
8.
Selecting a new sound or channel also removes the visual indications (static lit buttons) of step entries for the previously selected sound. The step buttons always show step entries for the currently selected sound.
9.
Note that you can erase or add step entries even if Run mode isn’t activated.
Setting pattern length
You may want to make settings for Pattern length, i.e the number of steps the pattern should play before repeating:
*
The range is 1 to 64. You can always extend the number of steps at a later stage, as this will merely add empty steps at the end of the original pattern. You could also make it shorter, but that would (obviously) mean that the steps “outside” the new length won’t be heard. These steps aren’t erased though; if you raise the Steps value again, the steps will be played back again.
About the “Edit Steps” Switch
If you set the pattern length to more than 16 steps, the pattern steps following after the 16th won’t be visible, although they will play back. To view and be able to edit the next 16 steps, you have to set the Edit Steps switch to 17-32. To see and edit steps beyond 32 you set the switch to 33-48, and so on.
Setting pattern resolution
Redrum always follows the tempo setting on the transport panel, but you can also make Redrum play in different “resolutions” in relation to the tempo setting. Changing the Resolution setting changes the length of each step, and thereby the “speed” of the pattern.
Step dynamics
When you enter step notes for a drum sound, you can set the velocity value for each step to one of three values: Hard, Medium or Soft. This is done by setting the Dynamic switch before entering the note.
The color of the step buttons reflect the dynamics for each step. Soft notes are light yellow, Medium notes are orange and Hard are red.
*
In the same way, you can enter Soft notes by holding down [Option] (Mac) or [Alt] (Windows) and clicking. Note that this doesn’t change the Dynamic setting on the device panel - it only affects the notes you enter.
*
If no velocity amount is set for a drum channel, it will play back the same, regardless of the Dynamic setting.
*
*
Pattern Shuffle
Shuffle is a rhythmic feature, that gives the music a more or less pronounced swing feel. It works by delaying all sixteenth notes that fall in between the eighth notes. You can activate or deactivate shuffle individually for each Redrum pattern by clicking the Shuffle button on the device panel.
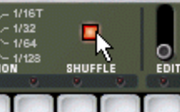
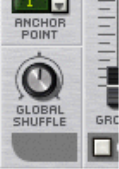
The amount of shuffle is set globally with the Global Shuffle control in the ReGroove Mixer - see “The ReGroove Mixer”.
Flam
A flam is when you double-strike a drum, to create a rhythmic or dynamic effect. Applying flam to a step entry will add a second “hit” to a drum sound. The flam amount knob determines the delay between the two hits.
To add a flam drum note, proceed as follows:
1.
2.
A red LED is lit above the step to indicate that flam will be applied to that step.
3.
The flam amount is global for all patterns in the device.
*
You can also click and drag on the LEDs to add or remove several flam steps quickly.
*
By adjusting the Flam knob you can create 1/32 notes even if the step resolution is 1/16, for example.
The Pattern Enable switch
If you deactivate the “Pattern” button the pattern playback will be muted, starting at the next downbeat (exactly as if you had selected an empty (silent) pattern). For example, this can be used for bringing different pattern devices in and out of the mix during playback.
*
The Mute indicator
The Enable Pattern Section switch
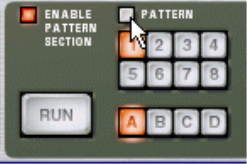
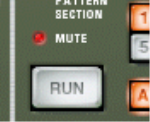
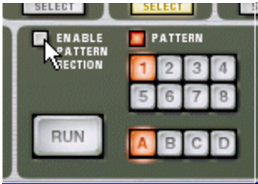
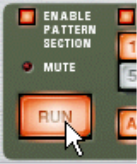
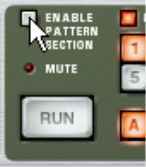
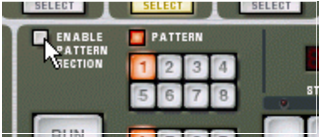
If this is off, Redrum will function as a pure “sound module”, i.e. the internal Pattern sequencer is disengaged. Use this mode if you wish to control Redrum exclusively from the main sequencer or via MIDI (see “Using Redrum as a sound module”).
Pattern functions
When a Redrum device is selected, you will find some specific pattern functions on the Edit menu (and on the device context menu):
Chaining patterns
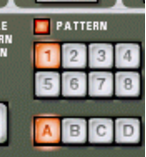
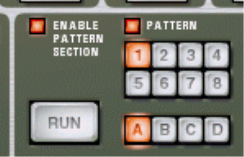
When you have created several patterns that belong together, you most probably want to make these play back in a certain order. This is done by recording or inserting pattern changes into the main sequencer. See “Recording pattern automation”.
Converting Pattern data to notes in the main sequencer
You can convert Redrum Patterns to notes in the main sequencer. This allows you to edit the notes freely, create variations or use Groove quantizing.
The “Copy Pattern to Track” function
This function useful when you have created a single pattern in the Redrum device and want to render individual note events on the sequencer track. You could also use this if you e.g. have created a drum pattern and want to have the pattern play back some other type of device.
Proceed as follows:
1.
You may want to make sure that the space between the locators is a multiple of the pattern length, to avoid “cutting off” the pattern.
2.
The pattern is converted to a single note clip on the track (see the notes below). If the space between the locators is greater than the pattern length, the pattern will be repeated in the clip to fill up the space.
An internal Redrum drum pattern converted to note events on the track
When you use the “Copy Pattern to Track” function with the Redrum, you should note the following:
The notes will have the pitch of the corresponding drum sound (see “Using Redrum as a sound module”) and the velocity depending on the “Dynamic” parameter value in the device.
“Soft” notes get velocity 30, “Medium” notes get velocity 80 and “Hard” notes get velocity 127.
Otherwise, the drum sounds will be double-triggered during playback (by the pattern section itself, and by the rendered notes on the sequencer track).
The “Convert Pattern Automation to Notes” function
If you have recorded or drawn pattern changes on a Redrum track, you can have the whole track converted to notes, in the following way:
1.
2.
For each pattern clip, the corresponding pattern is converted to note clips on the track (following the same rules as for the “Copy Pattern to Track” function). The track will play back just the same as when you played the pattern device with the pattern changes.
*
The “Enable Pattern Section” button on the device is automatically turned off.

Redrum Drum Computer : Programming patterns