Routing Audio and CV : Manual routing

Manual routing
To connect devices manually, you need to flip the rack around to see the back. This is done by pressing [Tab] or by selecting “Toggle Rack Front/Rear” from the Options menu.
Note that routing cables can be done regardless of the “Reduce Cable Clutter” setting on the Options menu. This means that you can connect cables even though they are hidden (see “Cable appearance”).
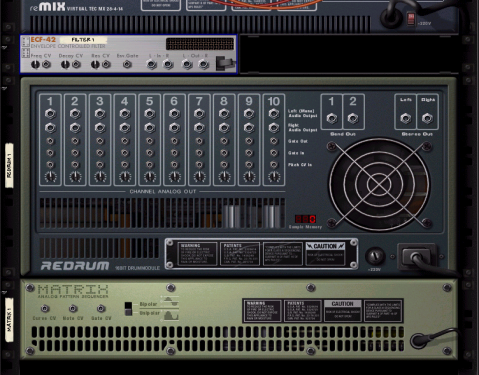
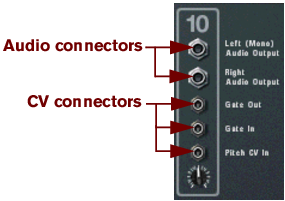
On the back of each device you will find connectors of two different types: audio and CV (Control Voltage, used for controlling parameters - see “Using CV and Gate”). Audio inputs and outputs are shown as large quarter inch jacks, while CV input and output jacks are smaller. For now, we’ll stick to the audio connections.
Audio and CV connectors.
*
There are two ways to route signals from one device to another:
Connecting cables
1.
A loose cable appears.
2.
When you move the cable end over a jack of the correct type (audio/CV, input/output) it will be highlighted to show that a connection is possible.
3.
The cable is connected. If both input and output are in stereo and you connect the left channels, a cable for the right channel is automatically added.
*
*
Connecting cables using pop-up menus
1.
A pop-up menu appears, listing all devices currently in the rack.
*
2.
A sub-menu appears, listing all suitable input/output connections. For example, if you clicked on an audio output on a device, the hierarchical sub-menus will list all audio inputs in all other devices.
It’s possible, however, to select an occupied connection. Doing so will disconnect the existing connection and replace it.
3.
The connection is created.
Disconnecting cables
There are two ways of manually disconnecting cables:
*
*
Disconnecting devices
It’s also possible to disconnect all cables from selected devices in one go:
*
All cables on the selected device(s) are now disconnected simultaneously.

Routing Audio and CV : Manual routing