Sampling : Editing samples

Editing samples
The Edit Sample window
Any sample present in the All Self-contained Samples folder in the Song Samples location in the Browser can be edited.
*
The Edit Sample window with an open sample.
The Edit Sample window can be resized in all directions by clicking and dragging the window frame. If you resize the window vertically, the displayed waveform will be resized vertically as well.
The Undo and Redo buttons work like the regular undo and redo functions in the main window menu, but these are used locally only for the Sample Edit window. The number of Undo and Redo steps in the Sample Edit window are limited to 10. Once you have clicked the Save button, you can still undo the entire sample editing procedure by using the Undo function in the main window.
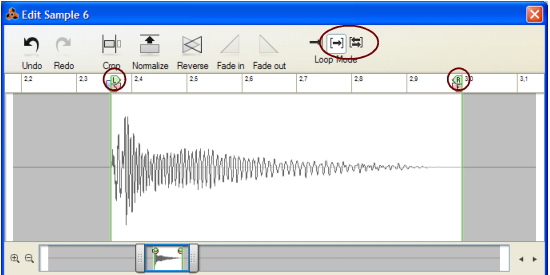
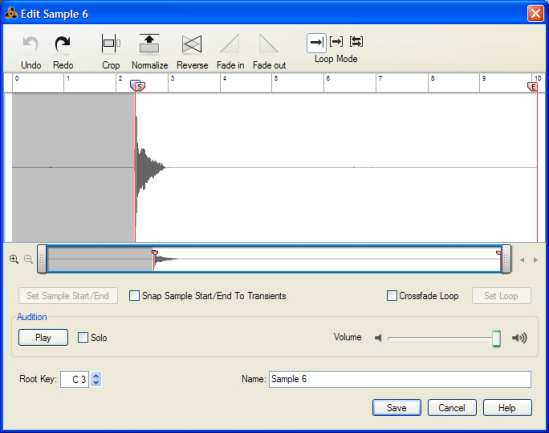
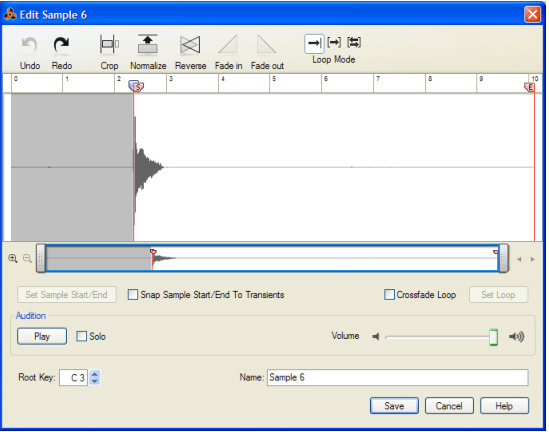
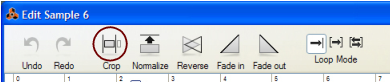
Click the Crop button to crop the sample so that only the content between the Start (S) and End (E) locators is preserved. The rest of the sample will be permanently deleted. See “Cropping samples” for more info.
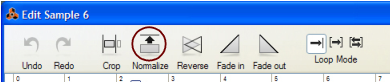
Click the Normalize button to amplify the entire sample so that the loudest peak touches 0 dB. Note that the entire sample is normalized, regardless of any locator settings. See “Normalizing samples” for more info.
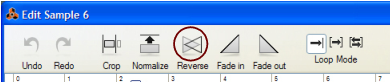
Click the Reverse button to reverse (play backward) the entire sample. Note that the entire sample is reversed, regardless of any locator settings. See “Reversing samples” for more info.
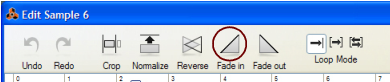
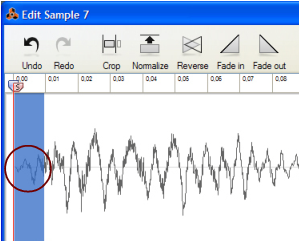
The Fade In and Fade Out buttons can be used to apply a fade in or fade out of the sample volume. See “Fading in/out samples” for more info.
Click one of the Loop Mode buttons to select loop type. The default (leftmost) setting is “no loop”. Then follow “Loop Forward” and “Loop Forward + Backward”. See “Looping samples” for more info.
Here, the currently open sample is displayed as one (mono) or two (stereo) waveforms. The Start (S) and End (E) locators are also displayed. By default the Start locator is placed where the audio begins in the sample. This means that if you have started sampling before there were any audio present, the playback will automatically start where the audio begins. This way you won’t have to manually move the Start locator in most situations.
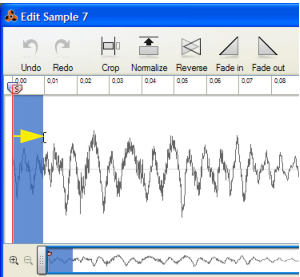
Below the waveform pane is the horizontal Waveform Navigator. This can be operated in the same way as the Song Navigator in the sequencer (see “Scrolling with the Navigators and scrollbars”, “Zooming horizontally in the Sequencer” and “Scrolling and zooming using a wheel mouse”).
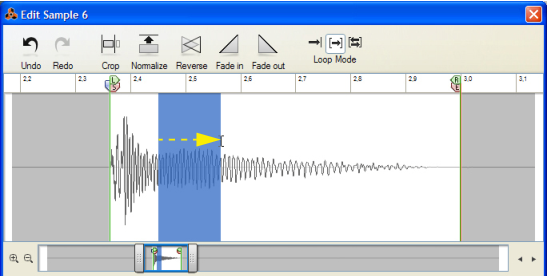
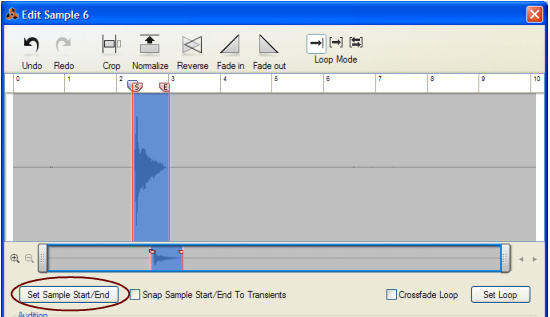
Set the desired sample playback region by clicking and dragging on the waveform pane. Then, click the Set Sample Start/End button to automatically place the Start and End locators at the beginning and end of the sample region. See “The Set Start/End function” for more info.
Click the Snap Sample Start/End To Transients button to make the Start and End locators snap to suitable transients in the sample as you move the locators. This makes it easier to find appropriate start and end locations for the sample playback.
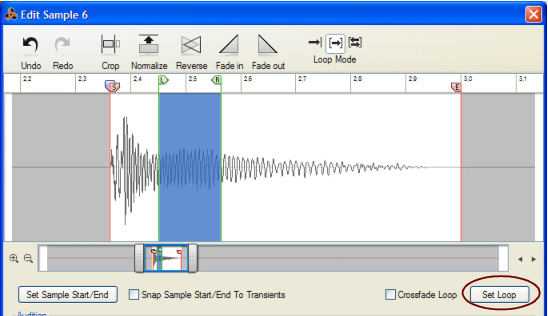
Tick the Crossfade Loop box to introduce a crossfade in the loop. Crossfade is useful to even out any clicks in the loop points, especially for sounds with fairly even volume throughout the loop region. See “The Crossfade Loop function” for more info.
Set the desired loop region by clicking and dragging on the waveform pane. Then, click the Set Loop button to automatically place the Left and Right Loop locators at the beginning and end of the loop region. See “The Set Loop function” for more info.
Click the Play button to play back the sample from the current position of the play head until the end of the sample. As soon as playback is started the button switches to display Stop instead, giving you the option of stopping playback. This is especially useful if your sample is looped. As an alternative to clicking the Play/Stop button you can press [Spacebar] to toggle between Play and Stop.
Tick the Solo checkbox to solo sample playback. This is useful if your song is playing in the background and you only want to listen to the sample.
Adjust the sample playback volume with the Volume slider to the right.
Set the sample Root Key (pitch) by clicking the spin controls, or by entering the desired note value in the display. If you know what note your sample is, select that note here. When you open the sample in a sampler device, the device will automatically transpose the sample correctly across the keyboard.
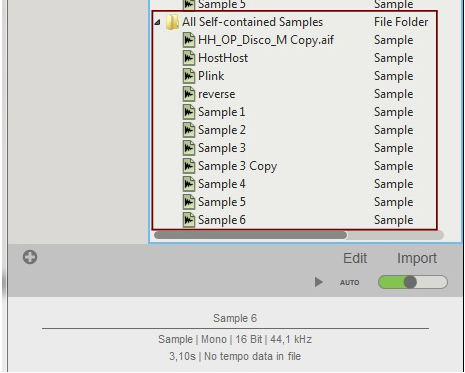
Type in desired name for your sample. Note that this will overwrite the original name of the sample in the Song Samples list in the Tool Window once you click Save. See “Renaming samples” for more info.
Click Save to save your sample. The sample will appear in the Song Samples location in the Browser. See “Saving edited samples” for more info.
Click Cancel to exit the Edit Sample window and discard from any edits you’ve made in the current sample.
Setting Sample Start and End
1.
The sample opens in the Edit Sample window.
If you have recorded the sample yourself in Reason, the Start (S) locator has been automatically placed at the first significant transient in the sound. The play head is also automatically placed at the Start locator.
2.
Play back the sample by clicking the Play button, or by pressing the [Spacebar].
*
*
3.
The Set Start/End function
Another way of defining a sample’s start and end positions is by using the Set Start/End function:
1.
The defined zone is highlighted in blue color.
2.
The Start and End locators are automatically placed at the beginning and end of the defined playback zone.
3.
Cropping samples
Cropping a sample means deleting parts you don’t want to keep, e.g. any silence in the beginning and/or in the end of a sample. The Crop function in the Edit Sample window deletes everything except what’s in between the Start and End locators, or everything outside any highlighted part of the sample. To crop a sample, proceed as follows:
1.
Alternatively, click and drag in the Edit Sample window to highlight the section you want to keep.
2.
Normalizing samples
Normalizing means amplifying the volume of the sample so that the loudest peak in the sound touches 0 dB. The Normalize function normalizes either the entire sample, or the highlighted part of the sample.
1.
To normalize the entire sample, you don’t have to do anything.
2.
Since the entire sample is normalized, this means that any noise present in the sound will also be amplified.
After the Normalize operation, the waveform is redrawn with the new volume values.
*
Reversing samples
Reversing a sample means playing it backwards, from the end to the start. The Reverse function reverses either the entire sample, or the highlighted part of the sample.
1.
To reverse the entire sample, you don’t have to do anything.
2.
After the Reverse operation, the waveform is redrawn with the reversed shape.
Fading in/out samples
Using short fades is useful if you want to remove clicks or pops in the beginning and/or end of the sample. You can also create longer fades to make a sound fade in and/or out nice and smoothly.
1.
The defined zone is highlighted in blue color.
2.
Clicking the Fade In button creates a fade in from complete silence at the beginning of the highlighted zone to the current volume at the end of the highlighted zone:
Clicking the Fade Out button creates a fade out from the current volume at the beginning of the highlighted zone to complete silence at the end of the zone.
After the Fade operation, the waveform is redrawn with the new volume values.
3.
Looping samples
Looping a sample means playing back the sample from the start and then playing back a defined zone in the sample over and over again (usually for as long as a key is depressed on the MIDI master keyboard). In practice, looping samples can be used to create “longer” sounds out of shorter ones. For example, if you have a flute sample you may want to loop the middle part of it so that you could make the sound sustain as for long as you like.
There are two different loop modes available in the Edit Sample window (besides the default non-loop mode):
In Loop Forward mode the sample is played back from the Start locator to the Right Loop locator, then playback starts over from the Left Loop locator and continues to the Right Loop locator over and over again.
In Loop Forward + Backward mode the sample is played back from the Start locator to the Right Loop locator, then the playback is reversed from the Right Loop locator to the Left Loop locator and then forward again to the Right Loop locator over and over again.
Adjusting the Loop locators
1.
The Left (L) and Right (R) Loop locators appear on the Waveform pane.
2.
If necessary, zoom in horizontally to more easily find suitable loop positions.
*
The Set Loop function
Another way of defining a sample’s loop positions is by using the Set Loop function:
1.
The defined zone is highlighted in blue color.
2.
The Left and Right Loop locators are automatically placed at the beginning and end of the defined zone.
3.
*
The Crossfade Loop function
Crossfades are useful for evening out clicks or transients at the loop points, especially in sounds with fairly constant volume throughout the loop zone. The Crossfade Loop function creates smooth volume crossfade around the Loop Locators.
*
This way you will quickly reach a good result.
*
*
Saving edited samples
*
The sample is saved, complete with all the edits you have made in the Edit Sample Window (Start, End, Loop settings, Name etc.) The sample will appear in the Song Samples location in the Browser, with the new name if this has been changed.
*
Renaming samples
1.
2.
*

Sampling : Editing samples