Sampling : Sample management

Sample management
About Assigned and Unassigned samples
Assigned Samples
Samples can be assigned to devices that support sample playback, such as the NN-XT, NN19, Redrum and Kong. Samples that are assigned to a device can be found in the Assigned Samples folder in the Song Samples location in the Browser:
The Assigned Samples folder can contain various sub folders, one for each sampler device used in the current song. The song in the picture above contains two sampler devices; the “NN-XT 1” and the “Redrum 1”. The instrument folders can be unfolded to display their current sample contents. Sounds you have sampled yourself as well as samples from the Factory Soundbank and from ReFills are displayed with icons.
Unassigned Samples
Samples that have been removed from a sampler device and have not (yet) been assigned to another sampler device are displayed in the Unassigned Samples folder:
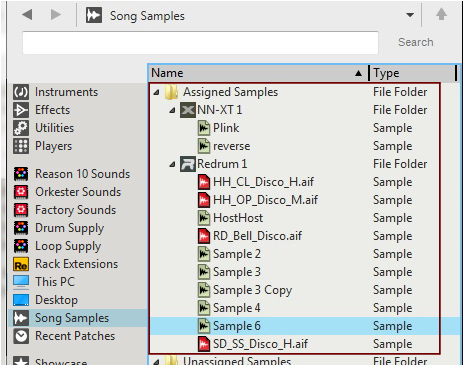
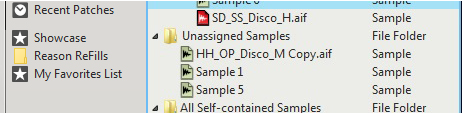
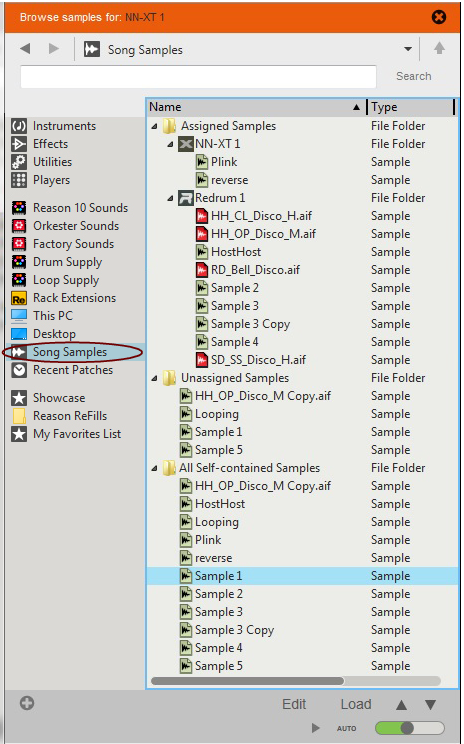
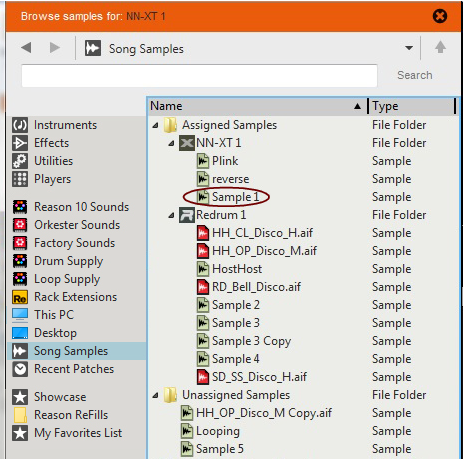
Unassigned samples can be assigned to any sampler device by simply loading them into a sampler device - see “Loading samples into a device”.
Saving samples in a song
When you have recorded a sample, by clicking a Sample button on a sampler device, the sample is automatically stored in the All Self-contained Samples folder in the Song Samples location in the Browser:
The samples you have recorded are automatically named “Sample ‘n’” where ‘n’ is a serial number.
You can rename a sample by selecting it in the All Self-contained Samples folder, clicking the Edit button, then renaming it in the Edit Sample Window and then clicking the Save button.
As soon as you save your song, all samples you have recorded will be automatically saved as self-contained samples in the song document. This way you don’t have to keep track of any “loose” samples on your computer.
Deleting samples from a song
It’s only possible to delete samples you have recorded yourself in a Reason song, i.e. samples that are located in the All Self-contained Samples folder in the Browser. Samples from the Factory Soundbank and from ReFills cannot be deleted because they are contained in ReFills.
*
*
Loading samples into a device
To load samples into a sampler device (NN-XT, NN19, Redrum, Kong and RV7000 Mk II) proceed as follows:
1.
Browse Sample buttons on NN-XT, NN19, Redrum and Kong respectively.
2.
In the picture below, we have clicked the Song Samples location and expanded all folders and subfolders:
3.
You can select a sample in any of the folders. If you like to audition a sample, click the Play button below the Browser list. To make samples automatically play upon selection, click the Auto button.
4.
When the selected sample has been loaded into the device, the corresponding sample file icon in the Browser has been placed under the device’s icon in the Assigned Samples folder. If the loaded sample was originally in the Unassigned Samples folder, it has now been moved from this folder to the Assigned Samples folder:
Duplicating samples
If you want to use an existing sample as base for new edits, you can do this by first duplicating the existing sample and then performing the edits on the duplicate. It’s even possible to duplicate samples from the Factory Soundbank and from any existing ReFills! However, duplicated samples from the Factory Soundbank or from ReFills cannot be exported to disk as separate files, but can only be saved as self-contained samples inside the song document.
To duplicate a sample, proceed as follows:
1.
2.
The duplicated sample appears - with its original name followed by the word “Copy” - in the All Self-contained Samples folder. The sample also appears in the Unassigned Samples folder:
To edit and/or rename the duplicated sample, refer to “Editing samples” and “Renaming samples”.
Exporting samples
If you like you can export samples that you have recorded in your song and save them as separate WAV or AIFF files to disk. Proceed as follows:
1.
*
2.
The following options are available:
This item shows up if you have edited the Start and/or End Markers and use a Loop with Crossfades. The sample will be cropped at the Start and End Markers and the crossfaded loop will be rendered into the sample.
*
This item shows up instead of the above item if no Loop is used. The sample will be cropped at the Start and End Markers.
The sample will be exported without Start or End Marker position data but with Loop data, if any. If the loop is crossfaded, the crossfade will be removed.
*
3.
The “Export Sample as...” dialog appears;
4.
5.
The sample is saved to disk using its original resolution (bit depth) and sample rate. The original self-contained sample in your song will remain intact.
About self-contained samples
All samples you record in a song automatically become self-contained. Self-contained means that the samples are automatically stored within the song when you save it. A great advantage with this is that you never have to keep track of any “loose” custom samples you use in your song - they are always included in the song document.
All self-contained samples in a song can be viewed by unfolding the All Self-contained Samples folder in the Song Samples location in the Browser:
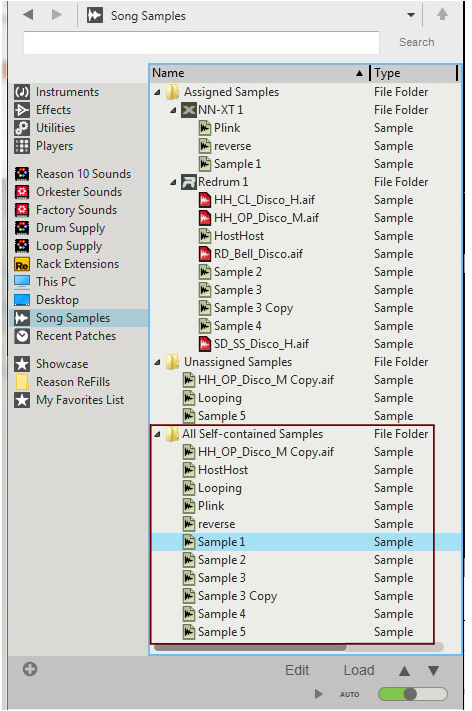
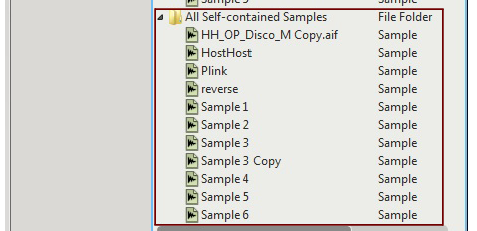
Self-contained samples can also be loaded into any sampler device from the Browser. See “Loading samples into a device” for more details.
Un-self-containing samples
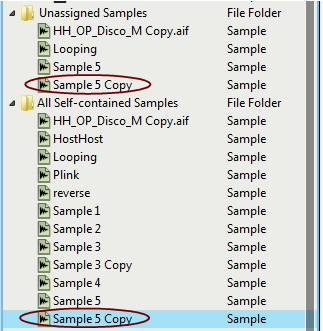
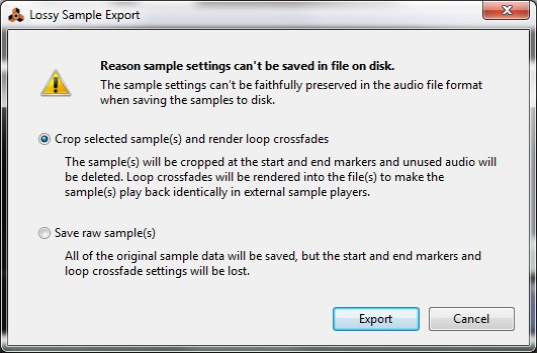
There might be situations where you want to “un-self-contain” your own samples, i.e. export the samples to disk as separate files and at the same time remove them from the song document. This can be done by selecting “Song Self-Contain Settings...” from the File menu - see “About Self-Contained Songs” for more details.

Sampling : Sample management