Sequencer Functions : Lane details

Lane details
A track consists of one (default) or several parallel lanes. Depending on track type, the clips on the lanes can contain various types of events. A lane can also contain clips with performance controller and parameter automation events - or pattern selection for pattern based devices.
Audio lane
The audio lane is not distinguished by a separate lane tab in the Track List like the other lane types. This is simply because an audio track can only have a single audio lane. Consequently, all audio lane elements reside in the audio track section instead.
Audio lane elements
To the right of the Record Enable Parameter Automation button is the Record Enable button. Make sure this button is on (red) before recording audio on the track. By default, this is activated when you select an audio track. If you want to record several audio tracks at the same time you need to click their Record Enable buttons first.
To the right of the Record Enable button is the Monitor button. Click this button to monitor the input signal of the track. The signal is monitored after the audio track channel strip which means that all channel strip parameters, including any Insert FX, Dynamics etc., will be monitored.
*
To the left below the Device icon is the Enable Tuner button. Click the button to switch to Tuner mode. The Input Meter to the right will switch to a Tuner.
Audio track in Tuner mode.
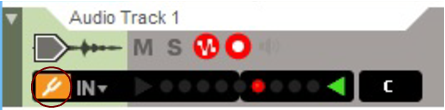
In Tuner mode, you can tune a connected instrument - an electric guitar, for example. See “Using the Tuner” for more info.
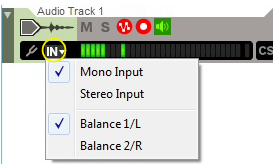
To the right of the Tuner button is the Select Audio Input drop-down list. Here, you select which audio input(s) to use for the track. See “Selecting audio input(s) and defining mono or stereo” for more info.
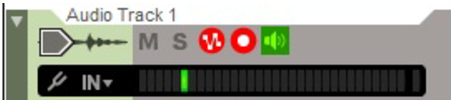
The Input Meter shows the level(s) of the input signal(s). If the selected audio input is mono, the Input Meter displays a single LED bar. If the audio input is in stereo, the Input Meter displays two parallel LED bars. See “Setting input level(s)” for details about setting input levels.
Note lane
As the name implies, the note lane can contain clips that feature note events. Clips on a note lane can also contain performance controller events. One or several note lanes can be present on an instrument track.
Note lane elements
At the top to the left is the name of the lane. As soon as you create a note lane it will automatically be named “Lane n” where “n” is the number of the lane - in chronological order. You can change the name of the lane by double-clicking in the name field, typing in a new name and then pressing [Return] on the computer keyboard.
*
Increase the vertical magnification by clicking the + magnification button below the Track List.
Below the note lane name is the “Record Enable” button. Make sure this button is on (red) before recording on the lane. By default, the “Record Enable” button on the latest created/added note lane is automatically activated when you select an instrument track.
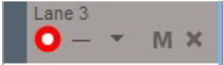
To the right of the “Record Enable” button is the “Groove Select” drop-down list. Here you can select a ReGroove channel for all clips on the lane. See more about ReGroove in “The ReGroove Mixer”.
Clicking the “M” button will mute the playback from the lane.
To the far right is the “Delete Note Lane” (X) button. Clicking this button will delete the lane (and all clips on it). If there are clips on the lane, a dialog appears prompting you to confirm deletion.
Parameter automation lane
An instrument track with two parameter automation lanes.
Parameter automation is used for controlling changes of device parameter values in a song. You could, for example, automate a filter cutoff parameter and record filter sweeps at various positions in your song. These kind of parameter value changes are recorded on parameter automation lanes.
Parameter automation lanes can exist in all track types and can contain clips with device and/or channel strip parameter automation. A track can have as many automation lanes as its device has automatable parameters. For Mix Channel and Audio Track devices, parameter automation could be used for any of their corresponding channel strip controls.
Parameter automation lane elements
Parameter automation lanes in a track can be folded/unfolded, as a group, by clicking the small triangle on the handle to the far left on the parameter automation lane tab.
*
The name of the automated parameter is displayed on the parameter automation lane tab. Since the name reflects the original device/channel strip parameter name, this cannot be changed.
Clicking the “M” button will mute the parameter automation playback from the lane. Muting a parameter automation lane will freeze whatever value the parameter had when you muted the lane. Deactivating the Mute button reactivates the automation.
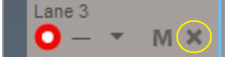
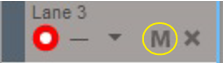
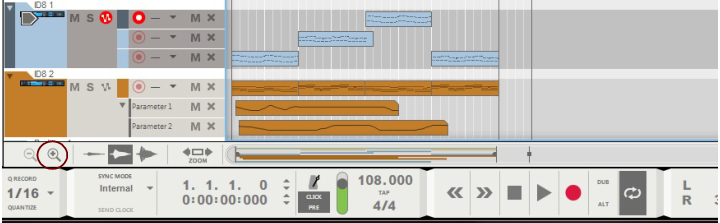
To the far right is the “Delete Automation Lane” (X) button. Clicking this button will delete the lane (and all clips on it). If there are clips on the lane, a dialog appears prompting you to confirm deletion. See “Deleting parameter automation lanes” for alternative ways of deleting parameter automation lanes.
Pattern lane
A Redrum track featuring a pattern lane.
A pattern lane can only exist in a track featuring a pattern based device, such as the Redrum Drum Module or the Matrix Analog Pattern Sequencer. A pattern lane can only contain clips with pattern Bank and pattern Number automation data. There can only be a single pattern lane per track.
Pattern lane elements
The name of the automated parameter is displayed on the pattern automation lane tab. Since the name reflects the original device parameter name, this cannot be changed.
Clicking the “M” button will mute the pattern automation playback from the lane. Muting a pattern automation lane will freeze whatever value the parameter had when you muted the lane. Deactivating the Mute button reactivates the pattern automation.
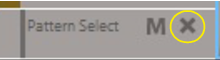
To the far right is the “Delete Pattern Lane” (X) button. Clicking this button will delete the lane (and all clips on it). If there are clips on the lane, a dialog appears prompting you to confirm deletion. See “Deleting pattern lanes” for alternative ways of deleting pattern lanes.
Creating/adding lanes
Adding note lanes
You can add additional note lanes on an instrument track. This can be useful under the following circumstances:
You can create new note lanes for selected instrument tracks in the following ways:
*
A new note lane will be created and automatically record enabled.
*
A new Note Lane will be created and automatically record enabled.
*
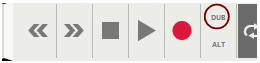
A new note lane will be created and automatically record enabled. See “Recording notes using the “Dub” and “Alt” functions” for more details.
*
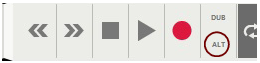
A new note lane will be created and automatically record enabled. At the same time, the previous note lane, or (if loop is activated and the Song Position Pointer is between the Left and Right Locators) the clips between the Left and Right Locators, will be muted. See “Recording notes using the “Dub” and “Alt” functions” for more details.
*
Creating/adding parameter automation lanes
Parameter automation lanes can be created for all track types.
Do as follows to manually create a parameter automation lane on a selected track:
*
A new parameter automation lane will be automatically created in the track for the corresponding device or channel strip. The automated parameter on the device in the rack or channel strip in the Main Mixer will get a green border, indicating that it has been automated.
*
Other ways of creating/adding a parameter automation lane are as follows:
1.
2.
A new parameter automation lane is automatically created on the selected track.
If you click the Track Parameter Automation drop-down list again, any selected parameters will have a symbol to the left of the parameter name, indicating that an automation lane already exists for the parameter.
The automated parameters on the device in the rack or channel strip in the Main Mixer will get green borders, indicating that they have been automated.
Creating a pattern lane
For pattern based devices such as the Redrum Drum Module and Matrix Analog Pattern Sequencer, a single pattern lane can be created on a selected track. Do either of the following:
*
*
*
*
When you create a pattern lane, the bank buttons on the device in the rack get a green border to indicate that they have been automated.
*
Deleting lanes
Deleting note lanes
A note lane can be deleted as follows:
*
This will delete the lane (and all clips on it). If there are clips on the lane, a dialog appears prompting you to confirm deletion.
*
Deleting parameter automation lanes
There are a number of different ways of deleting a parameter automation lane:
*
This will delete the lane (and all clips on it). If there are clips on the lane, a dialog appears prompting you to confirm deletion.
*
Another way is this:
*
The green border around the device parameter disappears and the corresponding parameter automation lane is deleted from the track.
Alternatively, do the following:
1.
2.
3.
All selected parameters will have a symbol to the left of the parameter name in the list indicating that it has been selected. Selecting a parameter with a symbol in the list will automatically delete the corresponding lane, with its clips, from the track. If there are clips on the lane, a dialog appears prompting you to confirm deletion.
The green borders that surrounded the automated parameters on the device/channels strip will also be removed.
Deleting pattern lanes
There are two ways of deleting a pattern lane:
*
This will delete the lane (and all clips on it). If there are clips on the lane, a dialog appears prompting you to confirm deletion.
*
Alternatively:
*
The green border around the device pattern section disappears and the corresponding pattern lane is deleted from the track.
Moving note lanes
A note lane has a “handle” and can be moved vertically together with all clips on the lane. Move a note lane to another position on the same track like this:
1.
2.
Just as when moving tracks, a red insertion line is shown indicating where the note lane will be placed after you release the mouse button.
*
Copying (duplicating) note lanes
You can copy (duplicate) one note lane at a time, together with its clips, by doing the following:
1.
The cursor gets a + sign next to it to indicate duplication. The destination of the duplicated note lane could be the same track or another track.
2.
*
Muting lanes
Muting a note lane
*
The note lane’s “M” (Mute) button.
Muting a parameter automation lane
*
The parameter automation lane’s “M” (Mute) button.

Sequencer Functions : Lane details