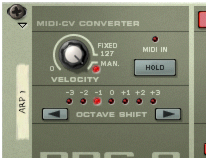
The MIDI-CV Converter section to the left contains parameters that affect the CV output from the RPG-8, regardless of whether the Arpeggiator section is activated or not. The following parameters are available:
The Velocity knob can be used to set a fixed velocity value for the notes that are output via the Gate CV Out jacks on the back of the RPG-8. If you set the Velocity knob to a value between “0” and “127”, the Gate CV Out will be fixed (at the set value) regardless of the velocity of the incoming MIDI notes.
Turning the knob fully to the right activates Manual (“Man.”) mode (a LED is lit when activated). In Manual mode the velocity levels will be sent out via the Gate CV Out with the same velocity value as they are input, i.e. “what goes in, will come out”. Manual mode is on by default in new devices.
There is also a “Velocity CV” input at the back. If this is connected to a controller source (a LFO modulation output for example), the output will be a merge between the Velocity setting and the applied CV modulation by the LFO - see “CV Inputs”.
If the Hold parameter is activated (lit button), an arpeggio will continue to run even if you release all keys. It will continue to arpeggiate the last notes played until a new note-on is received.
|
•
|
If you continue to hold down at least one key when Hold is on, any new notes will be added to the existing arpeggio as opposed to starting a new arpeggio.
|
|
•
|
If the Arpeggiator section is off, and the Hold function is activated, there will be no note-offs for incoming notes played (i.e. the CV Gate stays open).
|
|
•
|
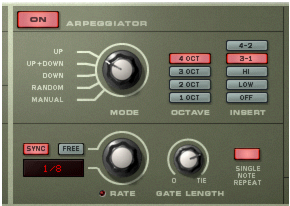
The middle section contains the Arpeggiator parameters that govern how the arpeggio is played. The following parameters are available:
|
| Mode
|
|||
|
|||
|
|||
|
|
If Sync is activated, the Arpeggiator will play in sync with the sequencer tempo. By changing the Rate you can make the Arpeggiator play in different tempo resolutions in relation to the tempo setting.
|
Straight, dotted or triplet note values are available in 1/2 to 1/16 resolutions. In addition, there are also 1/32, 1/64 and 1/128 (straight) note resolutions.
This determines the length of the arpeggio notes. Minimum value is 0 (Gate closed - no output). Maximum value is “Tie”, meaning the gate is open all the time. This parameter can be controlled via CV.
If the Octave setting is 1 Oct, the note will simply repeat (given the Gate Length setting is not set to “Tie”). If the Octave setting is set to anything else, the note will repeat according to the Octave, Mode and Insert settings.
|
|
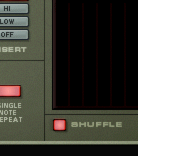
Shuffle is a rhythmic feature, that gives the arpeggio a more or less pronounced swing feel. It works by delaying all sixteenth notes that fall in between the eighth notes.
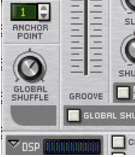
In the RPG-8 you can switch Shuffle on or off using the corresponding button. However, the amount of shuffle can be set globally (for all devices that incorporate this feature) with the Global Shuffle control in the ReGroove Mixer.
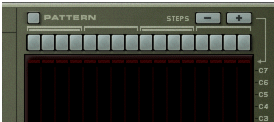
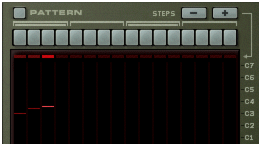
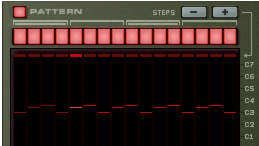
The Pattern editor allows you to introduce rests for arpeggio steps which can produce more rhythmic results. The Pattern editor has 16 step buttons at the top, and a main grid display where the arpeggio notes are represented as horizontal bars for each step in the arpeggio. The pitch of the arpeggio notes are shown on the vertical axis. Notes within the C-1 to C7 octave range are shown. Notes cannot be edited in the display, they are only a visual representation of the arpeggio.
|
|
When you play a chord (or in case you have recorded notes, when you start playback) the arpeggio will play according to the current Arpeggiator parameter settings, as normal.
|
Note that no arpeggio notes are “skipped”. Inserting a rest means that the step will be silent and the next active step will play the next note in the arpeggio pattern.
E.g. if you press the “Steps minus” button four times the last four step buttons will go dark and the Pattern editor cycle will start over after step 12.
When the Pattern editor is activated, you will find some specific pattern functions on the Edit menu (and on the device context menu). These are as follows:
|
| Function
|
|||
|
|||
|
|
In the sequencer, each automation point represents all the possible combinations of each of the 16 step buttons on/off status, so the numbers become slightly bewildering (there are 65535 possible variations).
|
This makes it difficult to control the automation by drawing events in the sequencer as each position represents a different combination of all the button’s on/off status.
|
|
You can of course automate the buttons manually while recording but this is not always a solution as you may wish to change the on/off status of several buttons simultaneously.
|
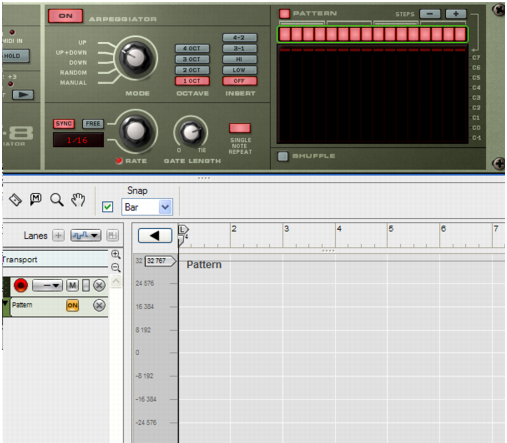
A Pattern automation lane is created and the Pattern buttons will have a green rectangle around them to indicate that they are automated.
|
3.
|
To record the button’s status, you need to press at least one button after entering record mode. Thus, you need to save one “last” button to press during record to automate the Pattern editor to an exact combination of the 16 button’s on/off status.
|
4.
|
Enter record mode and press the “last” step button where you want the automation to happen. Continue recording for as long as you wish the pattern to play, then click stop.
|
|
|
If the snapshot automation is not in the right time position, you can simply reposition the clip so that it starts where you want the change to occur using the usual methods.
|
|
6.
|
By using this general method you can continue to add further clips to the Pattern lane, each containing a “snapshot” of the Pattern editor buttons.
|
