While the specific parameters for the RV7000 Mk II effect device are described below, some features and procedures are common to all effect devices. Please, refer to “Common effect device features” for information about the Input meter, the Bypass/On/Off switch and Signal Flow Graphs on the effect device.
|
|||
|
|
1.
|
|
|
|||
|
|||
|
|||
|
|
|||
|
|||
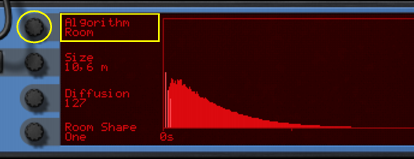
Emulates a hall. The parameters are the same as for the Room algorithm above (but the Hall algorithm offers larger Size settings).
|
|||
|
|||
|
|||
|
|||
|
|||
This is an advanced echo effect, with diffusion controls and tempo sync. When Echo is selected, the Decay control on the main panel controls the echo feedback (the number of echo repeats). The parameters are:
|
|||
|
|||
|
|||
The Multi Tap delay produces up to four different delays with separate delay times, panning and level. The whole set of four delay taps can then be repeated at a given rate. Again, the Decay control on the main panel controls the feedback (the number of repeats for the whole multi tap set). All delay times can be tempo synced.
|
•
|
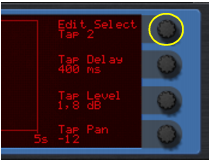
You use the Edit Select parameter in the top right corner to select which tap to make settings for - the three parameters below affect the currently selected tap.
|
|
•
|
With short Repeat times, the first tap may be repeated before the last tap has sounded. This can be used to create very complex multiple delay effects.
|
|||
|
The Reverse reverb algorithm in RV7000 Mk II is special in that it actually “moves” the source audio as well. Sounds fed into the Reverse reverb are “sampled”, a reverse reverb is created and played back and finally the “sampled” original sound is played back. For example, if you feed a snare drum hit into the Reverse reverb, you will hear a rising “backwards” reverb, followed by the snare drum hit.
|
|
Connect the RV7000 Mk II as a send effect using one of the Sends on the Mixer, activate the Prefader (PRE) switch for the send and lower the mixer fader completely for the source signal.
|
That way, the signal will be sent to the reverb but the dry sound from the Mixer channel isn’t heard. Again, the Dry/Wet control should be set to “Wet”.
Note that with this algorithm, raising the Decay setting on the main panel will make the reverse reverb start earlier and build up under a longer time. Similarly, the HF Damp parameter affects how fast the high frequencies are built up in the reverse reverb. In the remote panel, the Reverse algorithm has the following parameters:
|
|||||||||
|
|||||||||
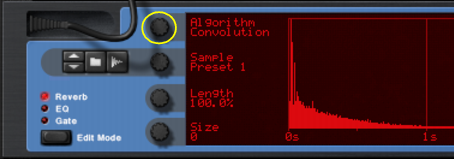
The zero-latency Convolution algorithm uses impulse response samples to generate effects. Basically, “convolution effects” are the results of multiplying the frequency spectra of the input signals with the frequency spectra of impulse response samples, and thus generating a signal with the “character” of the impulse response sample. If the impulse response sample is a recording of the reflections of a large room, for example, the resulting effect will be “the input audio signal played back in a large room”.
RV7000 Mk II comes with three built-in preset impulse response samples. You can also use any other samples for the convolution algorithm, to generate all kinds of reverbs and special effects. You can even sample your own impulse responses and use in the convolution algorithm in RV7000 Mk II.
|
|
Propellerhead have gathered a large number of impulse responses and collected them in a free ReFill, along with lots of patches for the RV7000 Mk II and the Combinator. The ReFill is called "RV7000 mkII patches" - download it for free from shop.propellerheads.se!
|
Note that in the Convolution algorithm the input signals for the effect are first summed to mono (except in Parallel Stereo Mode (see “Stereo Mode”)) and then processed with the impulse response sample. The figures below shows the signal routings in the Convolution algorithm:
|
|||
|
|||
|
|||
|
|||
|
•
|
If you want the impulse response sample to play back exactly like the original, make sure the Decay knob is at max, the LF Damp knob at zero and the Hi EQ knob at its 12 o’clock position. Also, make sure the Length parameter is at 100% and the Size parameter at 0.
|
If the impulse response sample is quiet at the end, reduce the Length value to cut it off a little earlier. The Decay parameter introduces a smoother “cutoff” at the end, which might be desirable in many situations.
|
•
|
Changing some convolution parameters re-calculates the impulse response in real time. Therefore, modulating these parameters might give unexpected results. Specifically:
Using CV to modulate the RV7000 Mk II in Convolution mode is not recommended. If you're using the Gate function (see “The Gate section”) in combination with Convolution, we recommend setting the Decay Mod parameter to 0 (see “Decay Mod”). |
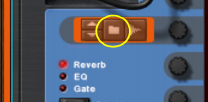
Besides the preset impulse response samples, you can load any other samples into the RV7000 Mk II and use as impulse responses. Loading a sample automatically switches the Algorithm to Convolution.
Here we have selected and loaded the “Fx_DubHead.WAV” sample to use as impulse response. You can see that the sample name is now displayed to the right of the Preset knob.
|
|
Note that the maximum length of a sample used as an impulse response is approximately 12 seconds. Longer samples are automatically truncated to 12 seconds (non-destructive).
|
|
|
To achieve stereo effects in the Stereo Mode alternatives (see “Stereo Mode”) you have to use stereo samples.
|
|
|
|
|
Note that the impulse response sample is NOT saved in the patch itself - only a reference to the sample! If you have loaded an external sample (that is not in the Factory Soundbank), you may want to save the patch with the sample in your song. See “About Self-Contained Songs”.
|
You can also sample your own impulse response samples and use with the Convolution algorithm. The sampling procedure is the same as for any other sampler device in Reason:
|
|
Note that the maximum length of a sample used as an impulse response is approximately 12 seconds. Longer samples are automatically truncated to 12 seconds (non-destructive).
|
|
|
To achieve stereo effects in the Stereo Mode alternatives (see “Stereo Mode”) you have to sample in stereo.
|
Please refer to the “Sampling” chapter for details on how to set up and sample in Reason.

