Note events can be recorded for instrument devices and are contained in note clips. Performance controller events, such as Mod Wheel, Pitch Bend and Aftertouch events, can also be recorded from instrument devices, and be contained in note clips, but they are described separately in “Parameter automation recording details”.
To be able to record notes for an instrument on a track in the sequencer, you need only create an instrument track as described in “Creating an instrument track”. The instrument track will automatically have Master Keyboard Input and the note lane will automatically be record enabled. Since you will only be recording MIDI events on the instrument track - and no audio - there is no need to adjust audio levels etc. These can always be adjusted afterwards.
It’s possible to quantize MIDI notes as they are being recorded. This will automatically align the start positions of the recorded notes to a pre-defined grid. Refer to “Quantize” for more details.
|
3.
|
The note clip’s start and end boundaries will automatically snap to the closest bar to make it easier to arrange (move etc.) later on.
|
|
If no MIDI events (notes and/or performance controllers) were recorded, the empty note clip will be automatically removed from the lane after you have clicked Stop.
|
|
|
When the Song Position Pointer has reached the Right Locator, the recording starts over from the Left Locator again and you can record additional notes. Any new recorded notes will be added to the previously recorded ones and all notes will be heard during the recording.
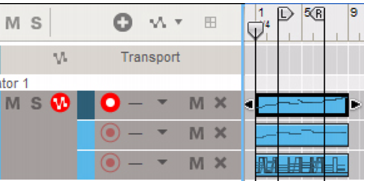
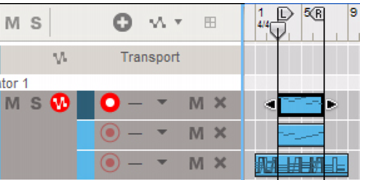
Recording over or into an existing note clip will simply add new note events to the previously recorded events in the note clip as described in “Recording notes in Loop mode”. However, If the new recording should start before the original clip, and expand into the original clip, a new clip will be created and will engulf the original clip. Let’s have a look at the following example:
The new clip is partly recorded over the original clip. The part of the original clip that has been recorded over is incorporated in the new clip; the events from the original clip are now contained in the new clip, and the start of the original clip has been moved to bar 5, where the new clip ends.
|
|
If you’re recording over or into a masked clip and the new clip engulfs masked events, the masked events will be permanently deleted! See more about masked events in “About masked recordings and events”.
|
|
|
Another, perhaps more convenient, way of overdubbing on an instrument track is to create additional note lanes and record new clips on these using the New Dub or New Alt functions described in “Recording notes using the “Dub” and “Alt” functions”. This way, you will get a better overview of exactly what you added in each of your recordings.
|
The “Dub” function creates additional record enabled note lanes on which you can record “overdubs”. This is the function to use when you want to add new notes in the same section of the instrument track but want the notes to end up in new clips on additional note lanes instead of in the original clip. All note lanes will play back together.
The “Alt” function creates additional record enabled note lanes on which you can record alternative takes. At the same time, the previous note lane will be muted. Only the most recently added note lane will play back.
|
|
Note that if Loop is activated and the Song Position Pointer is between the Locators, the clips between the Locators will be muted (instead of the lanes).
|
When using the “Alt” function in Loop mode, the clips between the locators will be muted - not the entire note lane. If the locators are placed over an existing clip, as in the example above, clicking the “Alt” button in Loop mode will split the clip and mute the clip between the locators.


