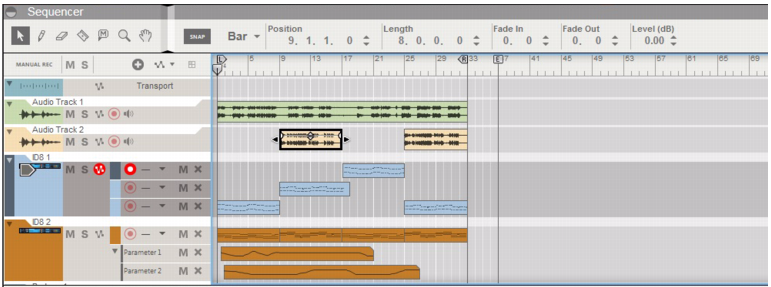
Arrange Mode is the “normal view” where you are working with your song arrangement. This mode gives a good overview of the content of the tracks in your song.
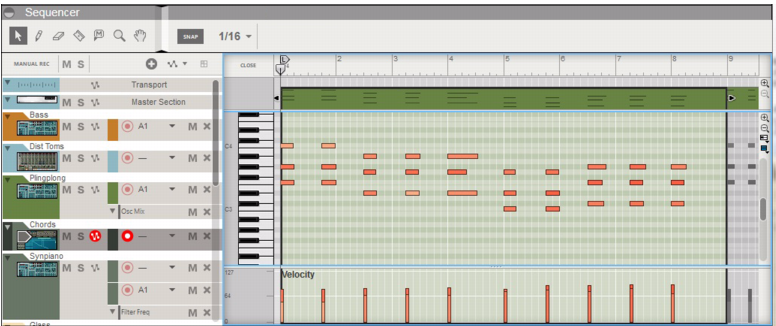
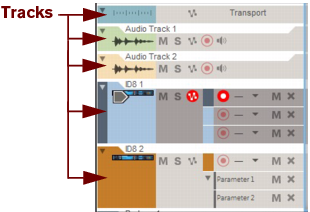
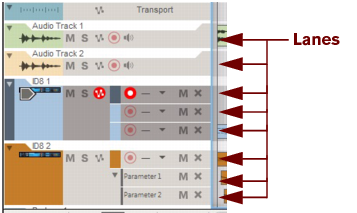
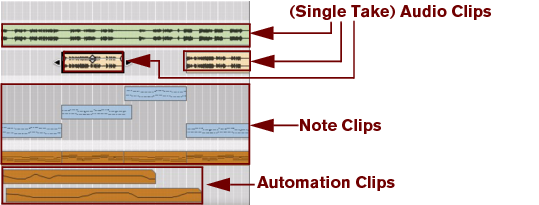
Edit Mode is where you edit the contents of the clips in your song. To enter Edit Mode, hold down [Ctrl](Win) or [Cmd](Mac) and press [E]. In Edit Mode the Edit Pane shows detailed information about the content of one track (see “Tracks overview”), or lane (see “Lanes overview”) at a time and you can edit the events in individual clips (see “Clips overview”).
|
|
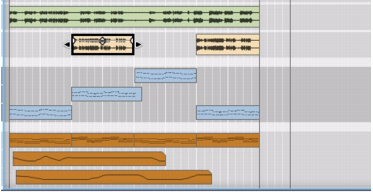
When you open a note or Comp audio clip by double-clicking it in Arrange Mode, the sequencer automatically switches to Edit Mode. However, if you double-click a Single Take audio clip or parameter automation clip, it opens up for editing inline, directly in Arrange Mode.
|
In Arrange Mode, all clips on all tracks can be viewed. Use this mode to get an overview of your arrangement, and when you want to perform clip-based editing such as rearranging whole sections of your song, etc.
In Edit Mode, you get a close-up look at the recordings on a track. In Edit Mode, the Edit Pane can be divided into several horizontal edit rows, showing different types of events (notes, velocity, audio, parameter automation, etc.). This is the view mode of choice for fine editing the content of your recorded clips, and for drawing notes, performance controllers and other events manually.
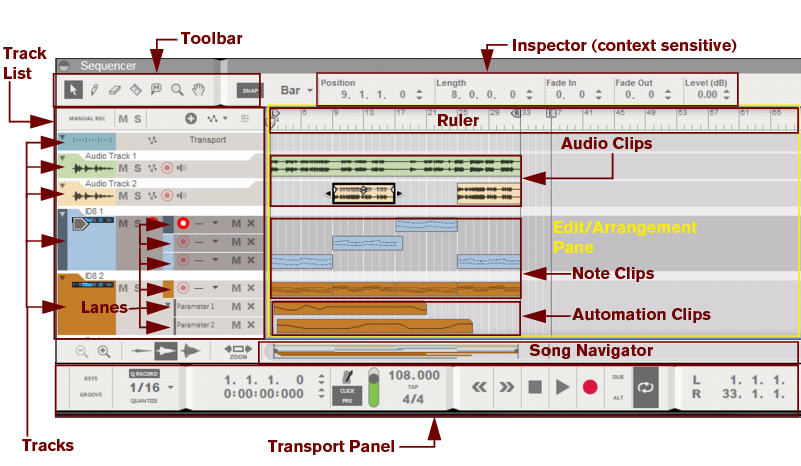
The sequencer Toolbar features various sequencer editing tools as well as the Snap function. The tools can be used both in Arrange Mode and Edit Mode, with slightly different purposes in the respective modes. See “Toolbar details” for details about each tool.
To the left in the sequencer, all tracks are listed in the Track List. Each track in the sequencer is associated with a specific device in the rack. By clicking on a device icon in the Track List you automatically set Master Keyboard Input (see “Setting Master Keyboard Input”) to the corresponding device in the rack for playing and/or recording.
Most rack devices in a song automatically get their own dedicated track in the sequencer when you create the device. Each track can feature one or several lanes on which audio, note, performance controller, pattern and parameter automation events can be recorded - in clips. See “Track details” for more details about tracks.
Each track consists of one (default) or several parallel lanes. The lanes can contain clips that feature note events or audio recordings, depending on track type. A track can also feature automation lanes that contain clips with parameter automation events - or pattern automation for pattern based devices. See “Lane details” for more details about lanes.
Note, audio, performance controller, pattern and parameter automation events are always contained in clips. A clip is basically a “container” for recorded data. Audio clips are displayed on the Edit/Arrange Pane as rectangular boxes with one or two graphical audio waves inside (mono or stereo). Note events are displayed in a “piano roll” fashion in the clip. Performance controllers and parameter automation events are displayed as continuous lines, and pattern events are displayed as repeated rectangles in the clips. See “Clip basics” for information about the different clip types.
The context sensitive Inspector shows the properties of whatever is currently selected in the sequencer: clips, notes, automation events, audio comp rows and cuts etc. The properties of the selected item can be edited by changing the values in the various displays. See “About the Inspector” for more info.
The Ruler is the song’s “time line”, measured in bars. In the Ruler, the Song Position Pointer indicates the current position in the song, i.e. in which bar the song is, or will begin, playing. The Ruler also shows the Left and Right Loop Locators as well as the Song End Marker. See “Ruler details” for more details.
The big center section of the sequencer is called the Edit/Arrangement Pane. This is where all recorded events reside in clips - on one or more lanes on the respective track.
To the far right in the sequencer is the Track scrollbar. With the Track scrollbar you can scroll vertically on the Edit/Arrange Pane. See “Scrolling” and “Zooming in the Sequencer” for more details.
Below the Edit/Arrangement Pane is the Song Navigator. With the Song Navigator you can scroll and zoom horizontally on the Edit/Arrangement Pane. The Song Navigator also features indicators for the Ruler’s Loop Locators, Song Position Pointer and Song End Marker. In the Song Navigator, all clips on all lanes are displayed as colored lines, indicating their positions in the song. See “Scrolling” and “Zooming in the Sequencer” for more details.
The Transport Panel features the sequencer transport controls (Rewind, Fast Forward, Stop, Play and Record) as well as controls for Tempo, Time Signature, Position, Time and Loop Locator placements and some other functions. See “Transport Panel details” for more details.
