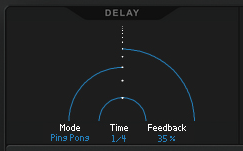
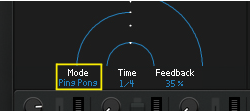
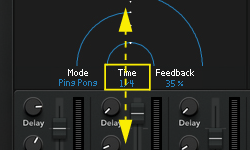
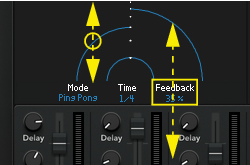
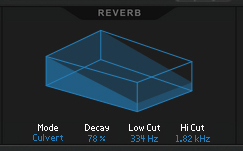
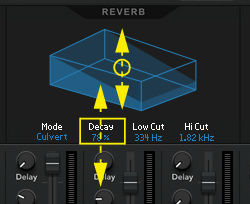
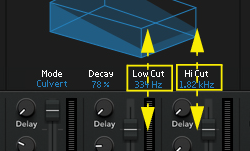
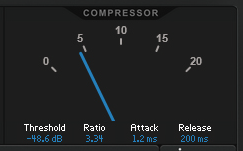
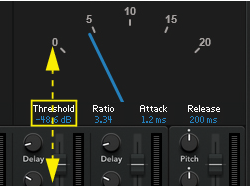
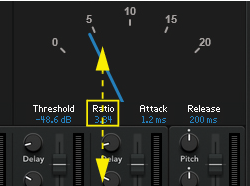
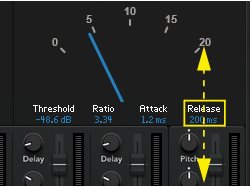
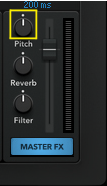
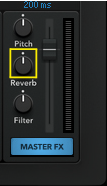
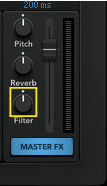
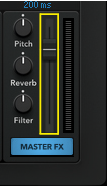
The Master FX section The Master FX section features controls for the Delay and Reverb send effects, as well as for the master bus Compressor. The Send Effects can be used by all Drum Channels simultaneously, and the effects are active simultaneously. Delay This is a delay with two different modes - Stereo and Ping Pong. The delay repeats are tempo synced and you can select the desired time division. Mode Click the Mode box and select the desired mode from the pop-up. “Stereo” repeats the delay in stereo in a fixed centered position.“Ping Pong” repeats the delays, alternating between the left and right channels. Time Click and drag the Time box up/down to set the time division of the tempo-synced delay repeats. The tempo is hard-wired to the main sequencer tempo. Time divisions: 1/1, 1/2D, 1/1T, 1/2, 1/4D, 1/2T, 1/4, 1/8D, 1/4T, 1/8, 1/16D, 1/8T and 1/16 Feedback Click and drag the Feedback box up/down to set the number of delay repeats. Alternatively, click and drag in the display to set the Feedback amount. Range: 0-100%, where “0” is one single delay repeat. Reverb This is a stereo reverb with six different Modes (reverb algorithms). Mode Click the Mode box and select the desired reverb algorithm from the pop-up. The following reverb types can be selected: • Room • Large Room • Culvert • Plate • Gated • Hall Decay Click and drag the Decay box up/down to set the length of the reverb effect. Alternatively, click and drag in the display to set the decay length. The Decay amount is also shown graphically in the display. Low Cut and Hi Cut This is essentially a combination of a highpass and a lowpass filter. Raise the Low Cut value to cut the low frequencies of the reverb signal and make the reverb effect less “muddy”. Range: 20 Hz to 25 kHz. Lower the Hi Cut value to cut off the high frequencies of the reverb, thereby creating a smoother, warmer effect. Range: 20 Hz to 25 kHz. Note that the Low Cut and Hi Cut cutoff frequencies can also be on opposite sides of each other, which means that the reverb level could eventually drop to zero with extreme settings. Compressor This is a stereo compressor, which acts on the total mix of all Drum Channels. It is always active, but if you don’t want any compression effect you can set the controls so that no compression is produced. The gain reduction is shown by the meter. Threshold This is the threshold level above which the compression sets in. Signals with levels above the threshold will be affected, signals below it will not. In practice, this means that the lower the Threshold setting, the more the compression effect. Click and drag the Threshold box up/down to set the threshold level. Range: -60 dB to 0 dB For no compression effect at all, set the Threshold to “0 dB”. Ratio This specifies the amount of gain reduction applied to the signal above the set threshold. A high Ratio value makes the sound less dynamic and more “even” in level. Click and drag the Ratio box up/down to set the compression ratio. Range: 1:1 to 20:1 For no compression effect at all, set the Ratio to “1.00”. Attack This governs how quickly the compressor applies the gain reduction when signals rise above the set Threshold (see above). If you raise the Attack value, the response will be slower, allowing more of the signal to pass through the compressor unaffected. Typically, this is used for preserving the attacks of the sounds. Click and drag the Attack box up/down to set the compressor attack time. Range: 0-200 ms Release When the signal level drops below the set Threshold (see above), this determines how long it takes before the compressor lets the sound through unaffected. Set this to short values for intense, “pumping” compressor effects, or to longer values for a smoother change of the dynamics. Click and drag the Release box up/down to set the compressor release time. Range: 0-200 ms Master Pitch Turn the Master Pitch knob to adjust the pitches of all Drum Channels equally. Range: +/-1200 cents. Master Reverb Turn the Master Reverb knob to adjust the Reverb return level. Range: +/-100%. Note that this control is bipolar, i.e. you could attenuate or amplify the reverb return level. This means that if any of the Reverb Amount knobs for the Drum Channels are < 0 dB, raising the Master Reverb knob to a positive value will increase the Reverb level for these Drum Channels. The level can never exceed 0 dB, though. Master Filter The Master Filter is a combined highpass and lowpass filter, which can be used for cutting out low or high frequencies in the total mix signal. At the default 0% setting the output signal is completely unaffected (not filtered at all). Turn the Master Filter knob to adjust the Low Cut and Hi Cut effect. Range: +/-100%. Master Volume Drag the Master Volume slider up/down - or just click - to set the output volume of the total mix. Range: -inf to 6.00 dB