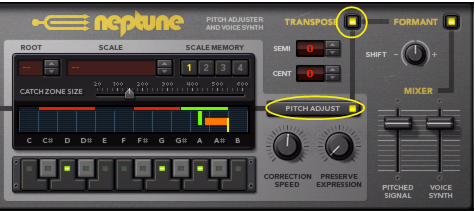
Pitch correction is great if you, for example, have a vocal track in your song that contains flat notes. Instead of having to overdub the flat parts on the audio track, you can automatically adjust the pitches of the flat notes using Neptune. You can also sing through the Neptune in real-time and get a beautifully pitched voice!
|
1.
|
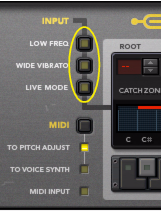
For very small pitch corrections, you might want to leave this off; for more substantial pitch changes you will get the most natural sound when this is activated.
The “Low Freq” mode will make Neptune detect low frequency notes in a more precise way. Note that the latency will become longer due to the fact that low frequencies have longer cycle times.
If your input audio has a heavy vibrato, this can cause Neptune to detect the wrong pitches. The result can be wobbling notes, unwanted swoops and glides etc. Activating the Wide Vibrato button will make the pitch detection ignore any vibrato in the input audio, eliminating the problems. Note however that the vibrato can still be retained in the processed sound, by raising the Preserve Expression parameter (see “About the Preserve Expression parameter”).
This will reduce the latency of the pitch correction to a minimum, which might be preferable if you want to monitor the corrected signal as you sing. Note, however, that the audio quality may be lower in Live Mode.
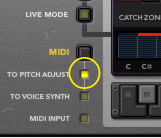
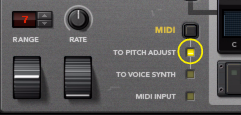
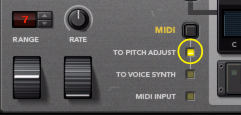
This will enable the pitch correction to be controlled also via MIDI (see “Using manual pitch correction”).
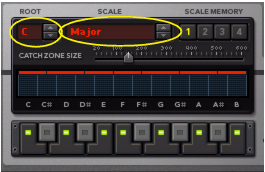
With the Root and Scale functions you can define what notes you want the incoming audio to be corrected to. The input audio will then be automatically corrected to the defined scale, without further user interaction. With the Catch Zone, Correction Speed and Preserve Expression parameters you can set the character of the adjusted signal.
|
|
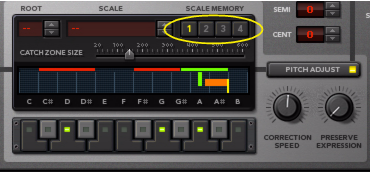
There are four Scale Memory slots in the Pitch Adjust section. The purpose of Scale Memories is to allow for automation of different Root Key, Scale and Catch Zone settings. A selected Scale Memory slot automatically stores which Root Key and Scale notes are active (see “Setting Root Key and Scale”), just like a Redrum stores what 16th note buttons are selected in a pattern. The Scale Memory slots also store Catch Zone settings (see “Setting Catch Zone Size”). By using automation of the Scale Memory slots from the Neptune sequencer track, you can easily switch characteristics throughout the song. The Scale Memory settings are automatically saved with the document when you save your Song.
|
|
Before you perform any edits of the Root Key, Scale and/or Catch Zone parameters, make sure you have selected a Scale Memory slot that you want to overwrite.
|
|
|
|
|
* When Chromatic is selected, the Root display will switch to show “--” since all notes in the 12-tone scale are included and the root key is of no importance here.
|
|
•
|
|
|
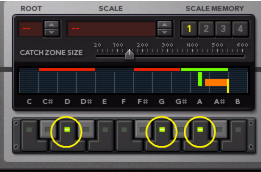
Note that this doesn't necessarily need to be an actual scale - sometimes you may only need to activate one or two notes, passing the other notes through, uncorrected.
|
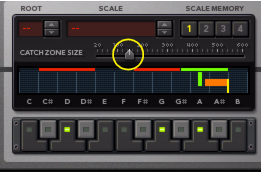
The Catch Zone Size parameter defines what pitches in each octave should be “caught” and adjusted towards the closest Target Notes.
|
|
The range is ±20 to ±600 cent, set in 20 cent steps. The range is always centered around the selected notes in the scale and the default value is ±100 cents.
|
•
|
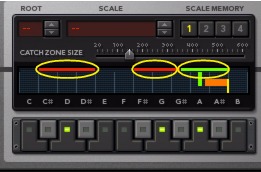
Catch Zones cannot overlap each other. If the Catch Zone Size is increased so that adjacent zones touch each other, they will stop expanding in that direction and meet “half ways”.
|
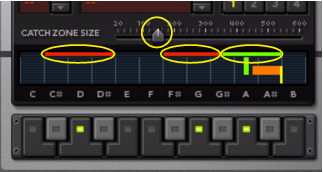
The Catch Zone size in the picture below is set to ±150 cents. As you can see, the Catch Zones for notes G and A have “collided” and therefore met half ways in the center of the G# note. If the Catch Zone size should be increased further, the G Catch Zone would expand only downwards and the A Catch Zone only upwards.
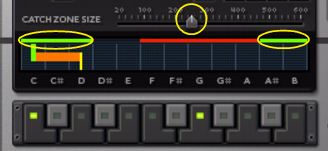
In the picture below, notes C and G are selected in a custom scale. The Catch Zone Size is set to ±250 cents. Since the Catch Zone for the C note extends also to the left outside the display, the Catch Zone “wraps around” visually and continues from the B note down to the A# note. Since the Scale is repeated downwards and upwards for every octave, the result of this setting is that the Catch Zone for the C note will cover the B and A# notes in every octave.
The Catch Zones for the selected notes C and G in a custom scale, with the C note Catch Zone “wrapped around” to cover also notes B and A#.
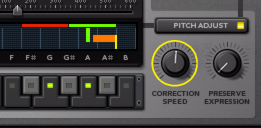
The Correction Speed parameter controls how fast the Input Pitch should be adjusted to the Target Note. The range is from Slow (knob turned fully counter-clockwise) to Fast (knob turned fully clock-wise).
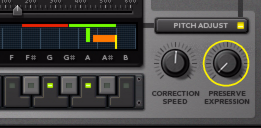
The Preserve Expression parameter controls how much vibrato in the input audio should be let through when you use a fast Correction Speed setting (see “Setting Correction Speed”).
|
•
|
With a minimum Preserve Expression value and a fast Correction Speed there will be almost no natural vibrato left in the pitch corrected voice.
|
This allows for incoming MIDI Pitch Bend and Vibrato (Mod Wheel) data to control the output pitch and to add vibrato to the output signal.
It’s possible to override the automatic (scale) pitch correction settings with monophonic MIDI note data at any time. This makes it possible to control the desired output pitches either by playing live on a MIDI master keyboard - or by playing back recorded MIDI notes from the Neptune track in the sequencer!
|
•
|
When you sing through Neptune and hold down a key on your MIDI master keyboard, the output pitch will correspond to the held MIDI note.
|
As soon as any MIDI note is received by Neptune, the Root Key, Scale and Catch Zone settings will be temporarily ignored. However, the Correction Speed (see “Setting Correction Speed”) and Preserve Expression parameters (see “About the Preserve Expression parameter”) will still be active.
|
•
|
|
|
If you transpose pitches several semitones compared to the input pitch, there could be strange formant effects that may or may not be desirable. To make heavily pitched signals sound more natural, you can use the formant correction function described in “Using Formant control”.
|
|
|
Note that MIDI control of the pitch correction will only momentarily override the Root Key, Scale and Catch Zone settings. As soon as there is no MIDI Note present, the automatic (scale) pitch correction settings will take over again.
|
